Checking Routing Constraints
-
In the Routing Assistant, click Routing Constraint Manager.
The Routing Constraint Manager appears. -
Click the Check Constraints
 button.
The Constraint Checker form is displayed.
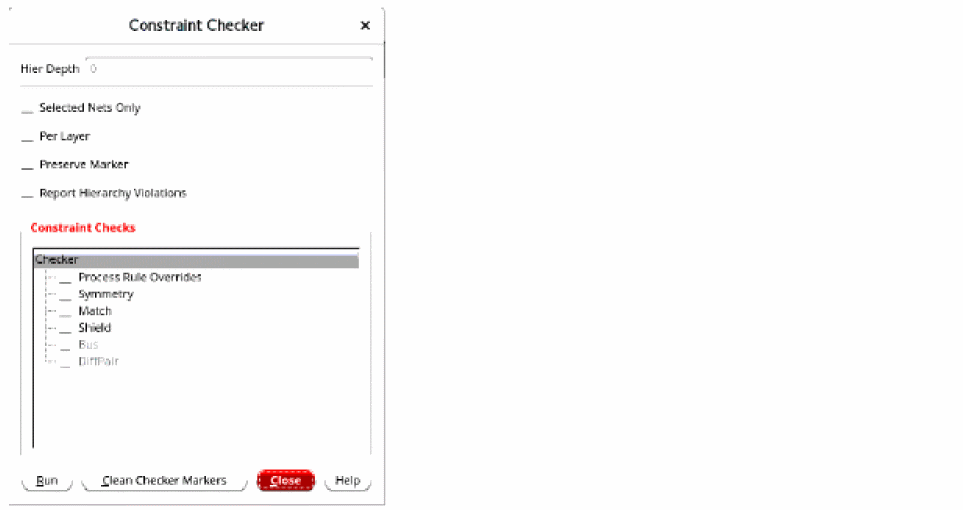
- Specify a value to adjust the depth of checks in the Hier Depth spin box.
- Click Selected Nets Only if you want to check the routing constraints only on certain nets that are selected in the Routing Constraint Manager rather than all nets.
- Select Checks to enable checks for all constraints.
- From the Constraint Checks list, select the constraint for which you want to run the check. For example, to check for all shields in the layout, select Shield.
-
Click Run.
You can see colored markers in the Routing Constraint Manager athat show the shield nets that have violations. The markers in the Routing Constraint Manager indicate that a constraint has a violation identified by the Constraint Checker. These markers are automatically updated in the Routing Constraint Manager if they are deleted outside of the Routing Constraint Manager, such as in the Annotation Browser or layout window.
You can also see the information in the CIW along with the warning markers in Routing Constraint Manager. The routing violations are also reported in the Annotation Browser. - Click Close to close the Constraint Checker form.
-
In the Annotation Browser, open the Constraints tab.
You can see that the shielded net is in violation because the tolerance is set to 0 in the shield constraint group. This leads to a situation where every single unshielded portion of the wire is reported as a violation. - Select any violation and see that it reports the missing pieces of shielding next to the pins.
-
To clean the warning marker in Routing Constraint Manager, click Clean Checker Markers at the bottom of the Constraint Checker form.
This removes all the warning markers that were created.
Related Topics
Checks for Routing Constraints
Routing Constraint Manager User Interface
Return to top