Adding Library to a Library Definition File
To add a library to a library definition file:
- Choose File – Open in the Library Path Editor window.
- Select the cds.lib file in the File Open form.
-
Click OK.
The library path editor displays the contents of the files. -
Choose Edit – Add Library.
The Add Library form appears.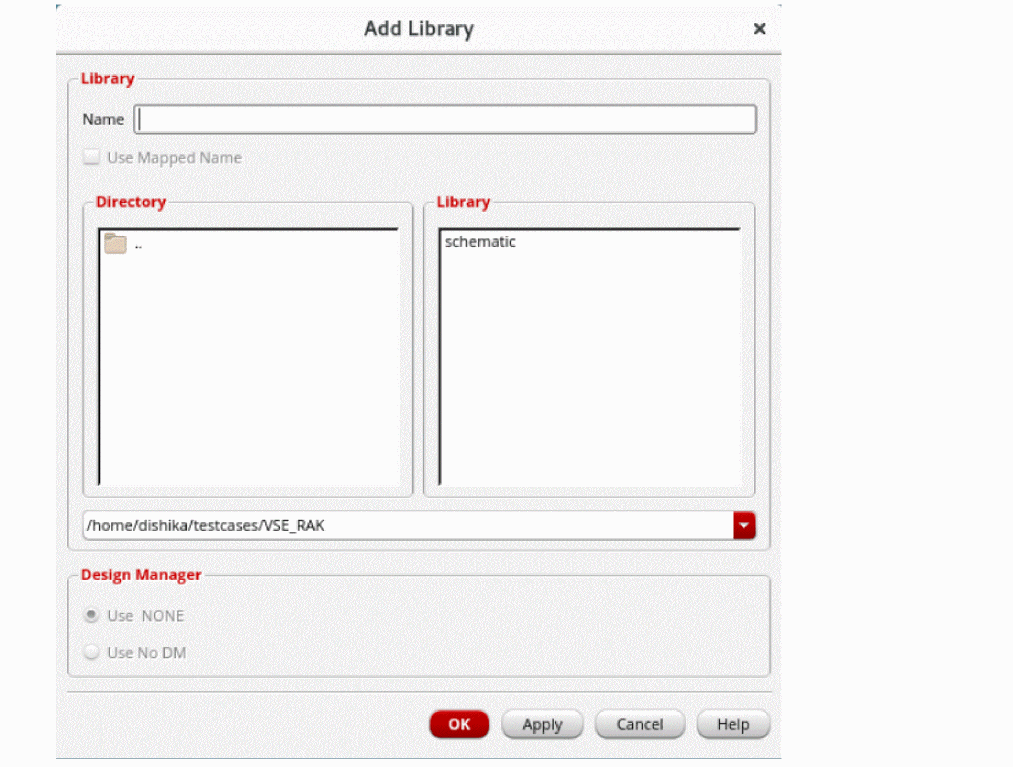
- In the Name field, type the name of the existing or new library you want to add.
-
Select the path to the library using the Directory and Library list boxes or type the path into the type-in field below the list boxes.
You can click the directory names in the Directory list box to move up and down in the directory hierarchy. Only library directories containing a validcdsinfo.tagfile appear in the Library scrolling list box.
The library added is the library specified in the Name field with the path shown in the Directory list box. Be sure that the path shown in the field below the Directory list box does not include the library name; if it does, the library path editor will create a directory with the same name as the library, plus the library. For example, if you specify the path/usr1/lib_dir/lib1wherelib1is the library name you specify in the Name field, the library path editor will create the library/usr1/lib_dir/lib1/lib1. -
Select Use Mapped Name if you want to map a directory name that appears in the Library list back to the application’s name space. The mapped name is displayed in the Name field. If this option is not selected, the directory name is added the way it is.
The directory name must be a valid name for it to be mapped.
For example, if you created a librarysample.libwith a Cadence application, it would have been mapped tosample#2elibin the file system. When you try to add that library in the Add Library form, the Library list box displays the file system name:sample#2elib. If you select the Use Mapped Name option, the library is mapped back and is added assample.lib; otherwise, the library is added assample#2elib. -
In the Design Manager section, select a design management system or Use No DM if you do not want the library to be managed.
If you are not running the software from a design-managed workarea, the Design Manager field is grayed-out. If you are running the software from a design-managed workarea, the appropriate design management system is listed as a choice. -
Click OK.
The library name and path appear in the library path editor window. -
Choose File – Save As.
Ensure that thecds.libfile has a check mark next to it in the Save As form.
Related Topics
Locking the cds.lib File for Editing
Deleting Libraries From the Library Path Editor
Return to top