Defining Bind-to-Open on a Per Cell Basis
You can specify that a single instantiation of a cell is to be skipped by setting a bind-to-open attribute on it.
Only non-text instances, such as schematic instances can be skipped using bind-to-open. Bind-to-open should not be set on hierarchical text instances.
You can set the attribute on a cell in two ways:
The Hierarchy Editor displays the string **UNBOUND** to indicate that a cell has a bind-to-open attribute. **UNBOUND** is not an error, unlike **NONE* . **UNBOUND** indicates that the cell is deliberately unbound while **NONE** indicates that the binding for the cell could not be determined from the binding rules.
To set a bind-to-open attribute on a cell,
- Choose View – Parts Table.
- In the Cell Bindings section, right-click the cell to which you want to add a bind-to-open attribute.
-
From the pop-up menu, select Add Bind To Open (Skip Cell).
In case multiple rows are selected, the pop-up menu displays the Add Bind To Open (Skip Multiple Cells) option.
The Add Bind To Open dialog box appears.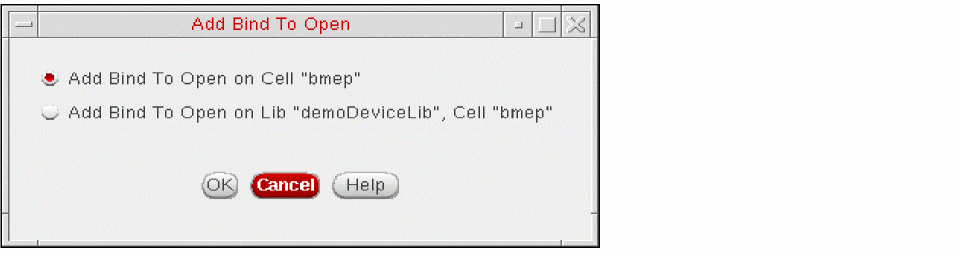
- In the Add Bind To Open dialog box, do one of the following:
-
Click OK.
The cell is now unbound. The Library, View Found and View to Use columns in the Cell Bindings section display**UNBOUND**. If you selected Add Bind to Open on Library "libraryname", Cell "cellname", only the View Found and View to Use columns display**UNBOUND**. Also, the instances contained in the cell are no longer displayed in the Instance Bindings section because the cell is now unbound.
Viewing Instantiations
To see a list of the instantiations to which the bind-to-open attribute applies,
- In the Cell Bindings section, right-click the cell.
-
From the pop-up menu, select Explain.
The Explain dialog box appears. The Instantiations section lists the instantiations of the cell. The bind-to-open attribute applies to all these instantiations.
Related Topics
Rules Definition at the Cell Level
Defining Stop Points on a Per-Cell Basis
Changing the Views in the View Choices List Box
Return to top