Compressing a Library Using Library Manager
This section describes the procedure of compressing a library.
-
Select Compression enabled to compress the library while creating a library, which results in reducing the disk storage space, offers faster load, and saves transfer time.By default, the Compression enabled check box is not selected.

-
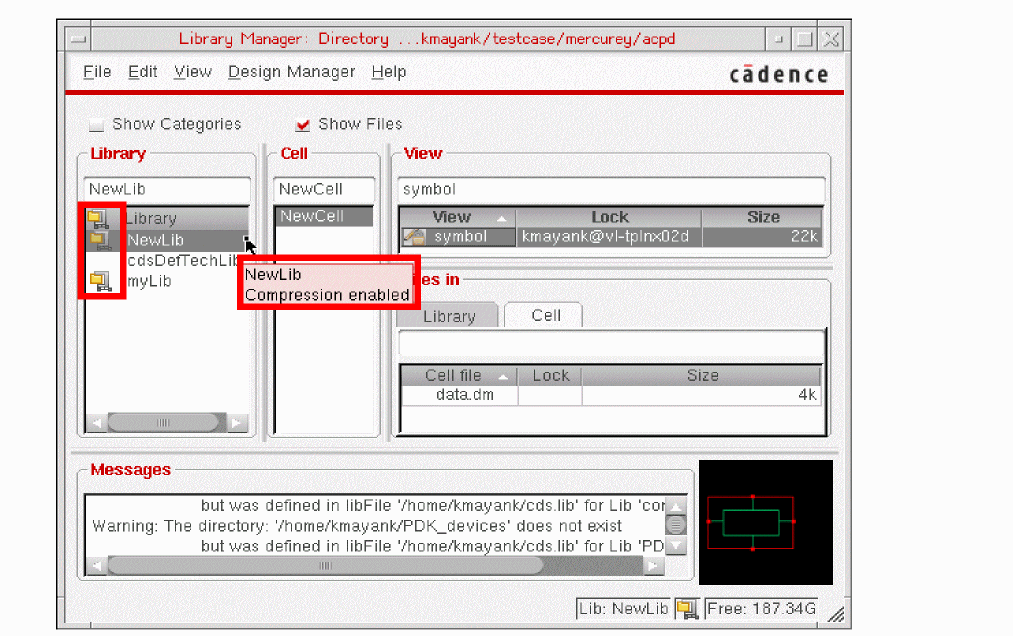
Once a new library is created with the Compression enabled check box selected, the Library Manager window shows a new compression
 icon corresponding to the compressed libraries.
 -
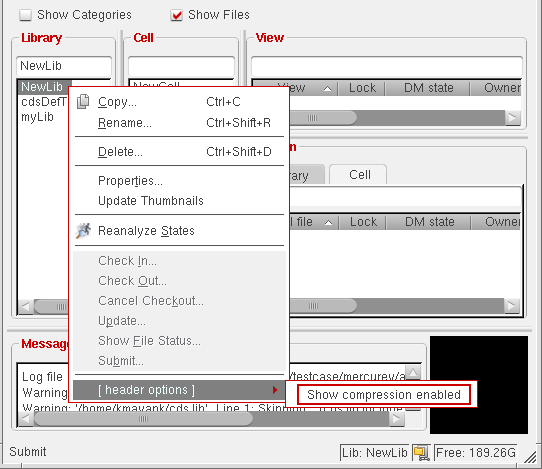
To view this icon, right-click the first library in the Library list box and select the [header options] – Show compression enabled option.
-
The compression icon is displayed for compressed libraries. Placing the pointer on a compressed library displays a tooltip indicating the compression status as enabled.
 The
TheshowCompressionDefaultvalue in.cdsenvsets the compression zip icon to be displayed as default if the$HOME/.libmgrfile is either missing or has noshowCompressionvalue. For example,cdsLibManager.showCompression: 1.Once the value in the$HOME/.libmgrfile is saved as either0or1, then that value is considered instead of the.cdsenvvalue. -
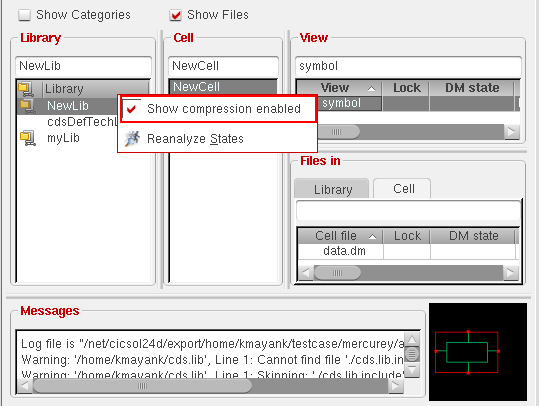
To remove the compression icon from the Library Manager window, you need to right-click the Library header and deselect the Show compression enabled option.
Additionally, you can make these enhancements to the Library Manager window:
-
Status Bar Notification
Status bar displays a name of the currently selected library, whether compressed or not, and the approximate free disk space of the volume holding the library at the lower-right corner of the window. For example, values in Megabytes (MB), Gigabytes (GB), or Terabytes (TB) of the free space is displayed. -
Resizable list boxes
You can also resize all the list boxes together by pressing and holding theCtrlkey and dragging the mouse pointer on one of the new list box divider. However, without using theCtrlkey pressed, only two adjacent list boxes would be sized at a time.
Related Topics
Return to top