Create Bus Form
The following table describes the fields available on the Create Bus form.
| Field | Description |
|---|---|
|
This section lets you specify the nets for which you want to create a bus and optionally lets you create a probe for the specified net. |
|
|
Specifies the net names for creating a bus. You can specify the net names separated by commas or spaces or specify them in bus notation, such as net<0:3>. New nets are created if the ones specified do not already exist. If you start creating a bus from existing pins, the net names are automatically picked from the net of the pins.
Environment variable: |
|
|
Creates probes for the autopicked, selected, or specified nets. |
|
|
This section lets you specify the width, direction, and style for the wire that you want to create. |
|
|
Specifies the width of each wire in the bus. You can increase or decrease the wire width by pressing
Environment variable: |
|
|
Specifies the distance between the centerlines of the bus wires. If no value is specified in this field, the |
|
|
Spreads bus wires for via placement. When wires are at the minimum wire spacing but the via spacings are larger, the wires can either be fanned out to connect to the vias in the pattern or can be back tracked to intersect the previous segment in the wire. Environment variable: fanOutToVias |
|
|
Creates a bus constraint automatically, if one does not already exist, for the nets you specify in the Net Name field or for the ones you pick by area-selecting multiple pins or instPins. You can view the created bus constraints in the Constraint Manager in Layout XL and higher tiers. Environment variable: weCreateBusConstraint |
|
|
Lets you specify the number of wires in an unassigned bus. The default value is
Environment variable: weBusNumBits |
|
|
Controls the direction in which to offset the pathSeg from the digitized points. The supported routing directions include center, left, and right. The default is center.
Environment variable: |
|
|
Creates wire at a specified distance from the digitized points with respect to the centerline of the pathSeg, in the direction specified by Justification. The default is
Environment variable: |
|
|
Controls how the beginning wire segment ends are created.
Environment variable: |
|
|
Specifies the value for the begin extension of the wire. This field is enabled when Begin Style is set to variable.
Environment variable: |
|
|
Controls how the beginning wire segment ends are created.
Environment variable: |
|
|
Specifies the value for the end extension of the wire. This field is enabled when End Style is set to variable.
Environment variable: |
|
|
The following options let you specify the snapping behavior for the bus that you want to create. |
|
|
Controls how the cursor snaps when you create a bus.
The default value is orthogonal.
Environment variable: |
|
|
Snaps the bus wires to the center of rectangular pins or of pins that are created as polygons and have rectangular shapes. When this check box is selected, bus wires snap to the starting and ending pins centers. By default, the Snap to Pin Center check box is not selected.
Environment variable: |
|
|
Finishes the Create Bus command as soon as a point is digitized on a flightline target object (pin, existing wire, or via). All wires in the bus snap to the target pin. This option is selected by default. |
|
|
Snaps wires to the center of vias. If this check box is selected and you click a via, the starting wire starts from the clicked point and two small segments are added to connect to the via origin. With this check box selected, tapping a via and a wire gives preference to the via. This check box is off by default.
Environment variable: |
|
|
Adjusts the wire segment to automatically cover the source and target pins. Otherwise, the wire segment is not adjusted and the wire terminates at the point you chose. By default, this option is deselected. 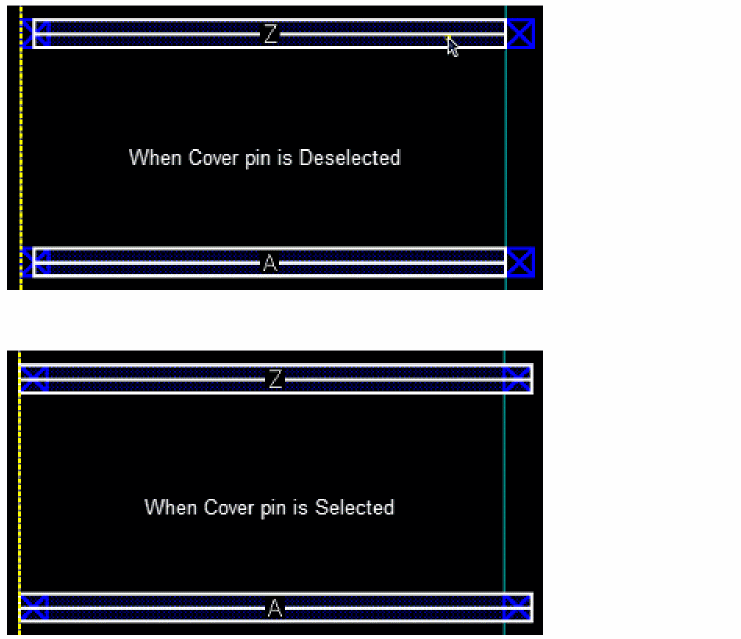
Environment variable: |
|
|
Enables or disables the feature to specify a multi-layer pattern.
The Custom Layer Pattern combo box lets you specify a multi-layer pattern or select an existing multi-layer pattern. For more information, see |
Related Topics
Return to top