Technology File Requirements for Track Patterns
You can create track patterns on Metal and Poly layers. The following shows the technology file requirement for creating track patterns on a metal layer.
layerDefinitions(
techPurposes(
(track 229 trk)
...
)
techDisplays(
(metal1 track packetName t t t t t)
...
)
techLayerPurposePriorites(
(metal1 track)
...
)
layerRules(
functions(
(metal1 "metal" 3)
...
)
To efficiently utilize the routing area, tracks should be created considering the following design aspects:
- Minimum Routing Pitch
- Via Stacking
- Preferred and Non-Preferred Routing Directions
- Diagonally Adjacent Vias
- Track Spacing
- Number of Tracks
- Track Patterns Assigned to Routing Layer “None”
Minimum Routing Pitch
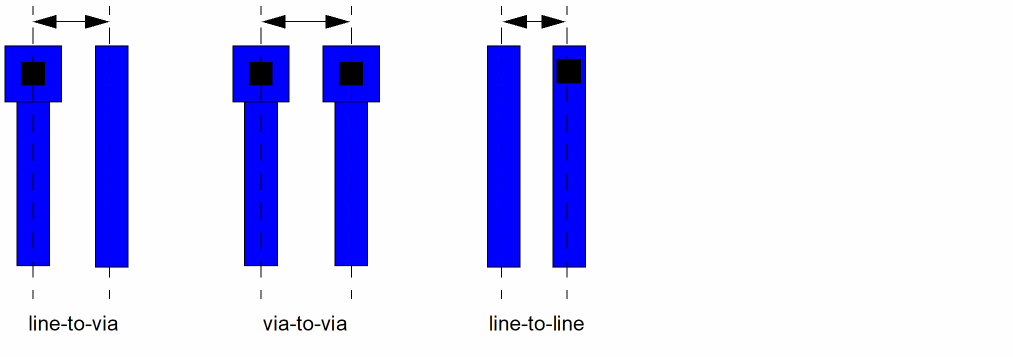
Track spacing is determined from the routing pitch. The most common routing pitch is line-to-via because it allows the minimum pitch between routes in which a via can be placed next to a route. A larger pitch does not efficiently utilize the routing area, where as a smaller pitch may result in low utilization of the routing area because the router will not be able to place vias next to a route.
Via Stacking
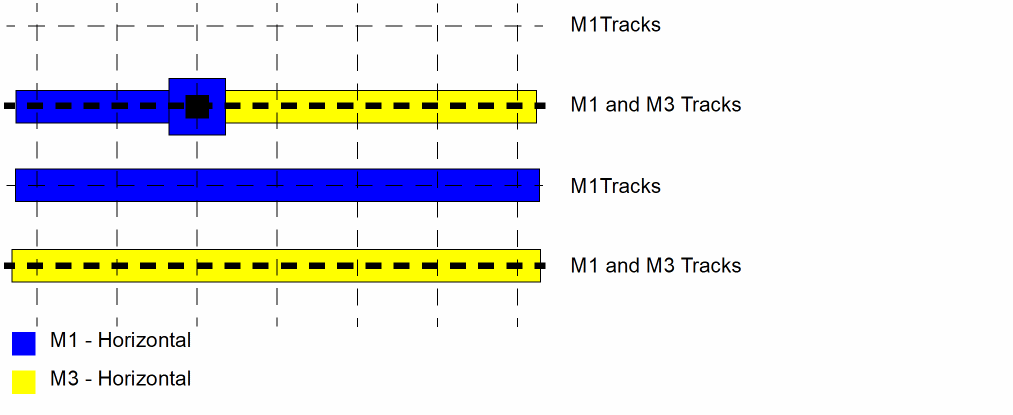
Routing layers using the same preferred direction can be placed on coincident tracks to allow for via stacking. If tracks cannot be coincident, place the tracks at a ratio, for example 1:2 or 2:3.
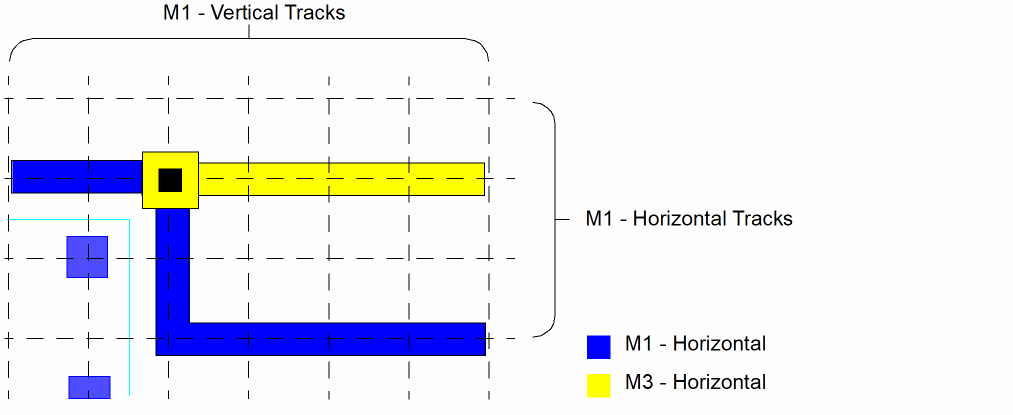
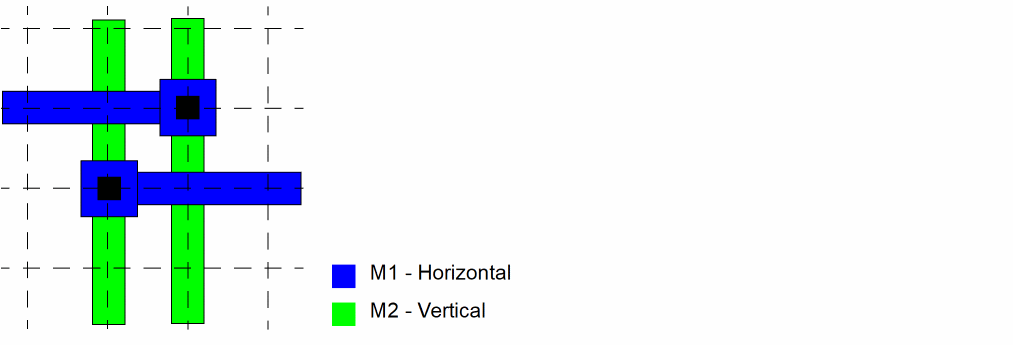
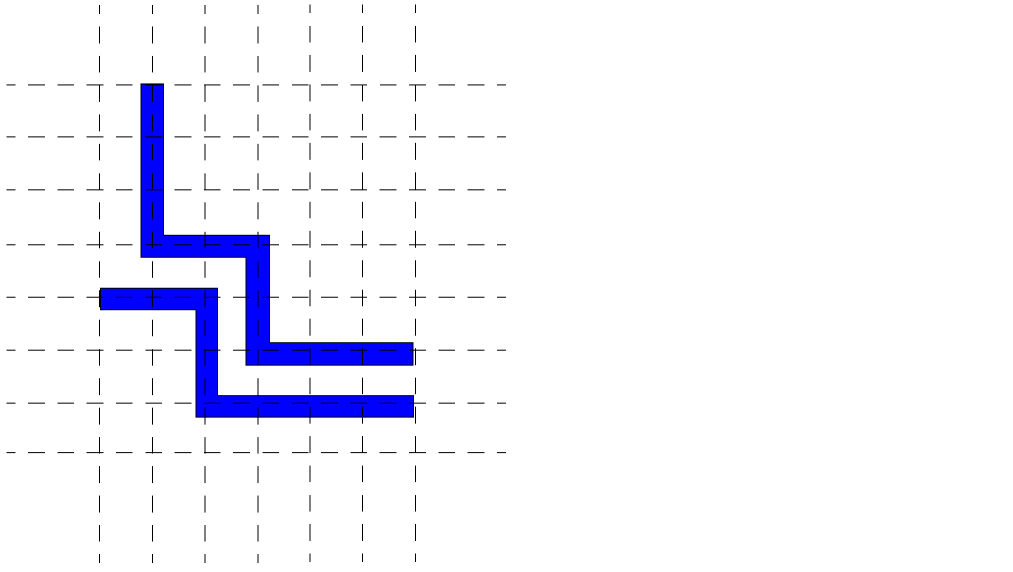
Preferred and Non-Preferred Routing Directions
Tracks are created in both the preferred and non-preferred routing direction to allow for X Y locations where routes can be jogged and vias and pins can be placed and connected. Points where a horizontal track on one layer crosses over a vertical track on another layer are via locations where a vias can be placed. Most routing is done on the tracks aligned in the preferred direction. Small-distance jogs use tracks in the non-preferred direction.
Diagonally Adjacent Vias
Increasing the routing pitch may be necessary to allow for diagonally placed adjacent vias. This may increase the orthogonal spacing but can reduce the overall die size by readily allowing connections to via rather than longer routes around congested areas.
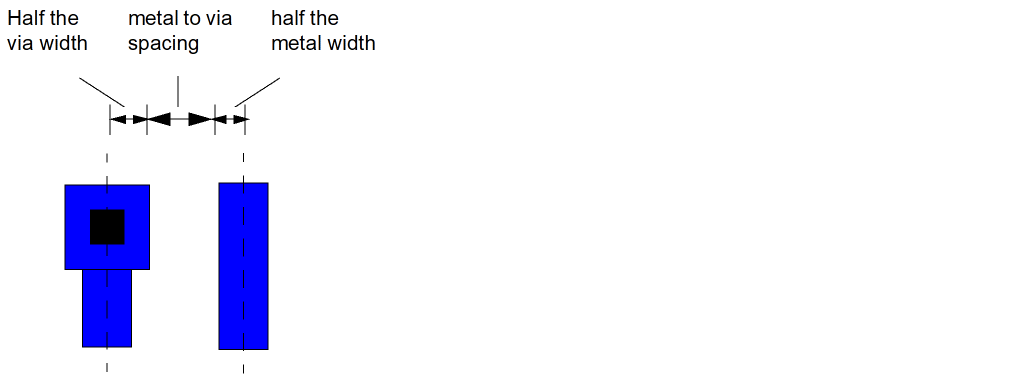
Track Spacing
You can determine the line-to-via track spacing (routing pitch) for each routing layer by adding the following:
Half the via width + metal to via spacing + half the width of the metal
Number of Tracks
You must determine the number of tracks needed for the width and the height of a cellview. Calculate the number of horizontal tracks by dividing the height of the design area by the routing pitch of the metal. Determine the number of tracks needed in vertical direction using the same method. Create horizontal and vertical track patterns for each routing layer. When Snap to Track is on in the Layout Editor Options form, you are only allowed to route in areas where there are intersecting horizontal and vertical tracks.
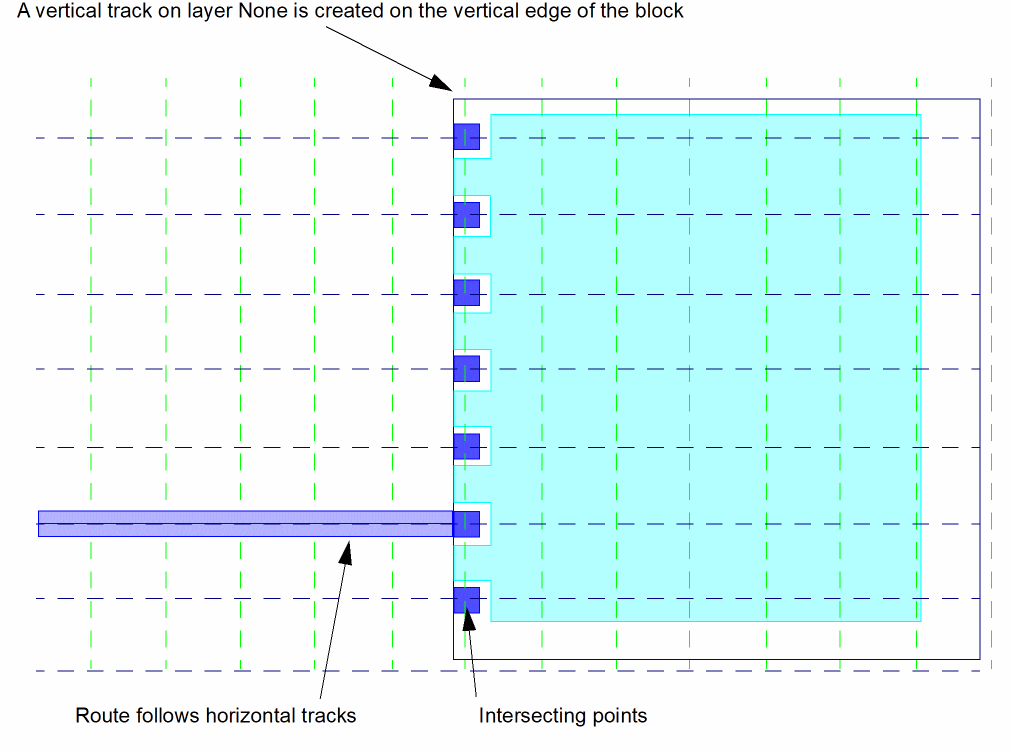
Track Patterns Assigned to Routing Layer “None”
Track patterns can be created without an assigned routing layer. This can be done to save a routing track for use with other applications. Some tools, such as a global router, section the chip by looking at the number of routing tracks. Creating additional tracks without a routing layer can trick the tool into seeing more sections.
This can also be used to defined points for placing pins without allowing routing in one direction. For example, on the vertical edge of a block, you may want to place pins for a horizontal route but you may not want to route on the vertical edge because the route would be half outside the block. To resolve this, you can create a vertical track directly on the vertical edge. The intersection points of the vertical track and the horizontal tracks define valid points to place pins. The router can route to the pin inside the block using the horizontal tracks, but cannot route to the pin, inside the block, vertically.
Related Topics
Return to top