Creating a Cluster Boundary
Cluster Boundary defines an area in which the contents of a specific cluster are included or excluded, depending upon their definition. The cluster boundary is attached to a specific cluster object. Each cluster boundary has a unique name with respect to all other cluster boundaries in a given cellview.
- In the layout window, choose Create – P&R Objects – Cluster Boundary.
-
Press
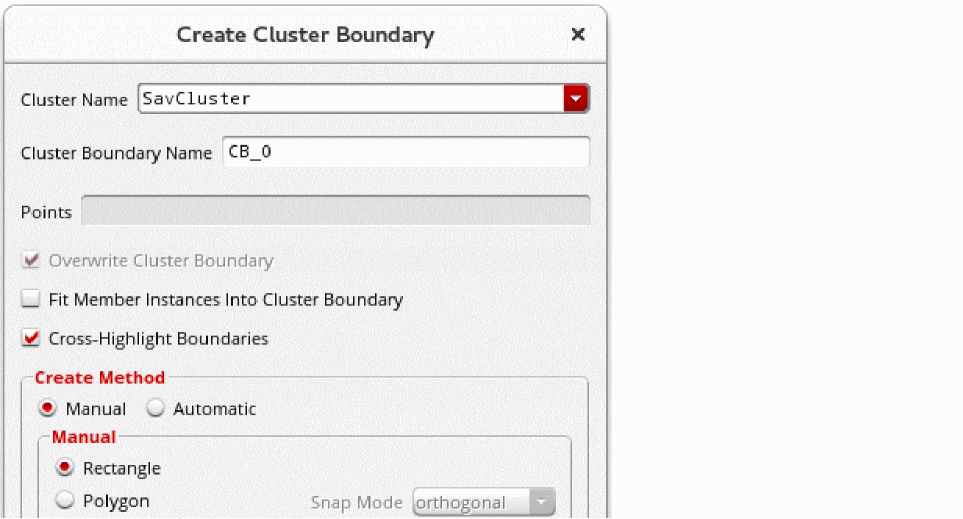
F3to open the Create Cluster Boundary form. -
Select an existing cluster for the boundary from the Cluster Name list.
-
Optionally, overwrite the automatically assigned name by typing a name for the boundary in the Cluster Boundary Name field. The name must be unique to the cellview.
The software automatically assigns names beginning with CB (for cluster boundary), followed by an underscore, then a number unique to the cellview. - Turn on Cross-Highlight Boundaries when generating new cluster boundaries; use this option to help you associate existing clusters with their boundaries.
-
From Create Method, choose either Manual or Automatic.
- When Manual is selected, choose either Rectangle or Polygon
- When Automatic is selected, the boundary is created using the aspect ratio, origin, and target area. Aspect Ratio W/H is the width-to-length ratio of the cluster boundary. For example, a value of 1 specifies a square boundary, 2 specifies a boundary twice as long as it is wide, and .5 specifies a boundary half as wide as it is long. The default is 1.
If the target area is greater than 0 and you create a rectangular cluster boundary whose area is less than the target area, a warning is issued in the CIW stating that the utilization value is greater than 100%.
Related Topics
Return to top