Cloning between Multiple Cellviews
You can generate a clone in a layout different from the one in which you selected the clone source.
To clone components across multiple layout cellviews:
-
Open both the source and the target layout cellviews in Layout XL.
The layout cellview that you want to use as the clone source can be opened in read-only mode. - In the target layout cellview, choose the Connectivity – Generate – Clones command to open the Generate Clones form.
-
In the Layout Cellview drop-down list, select the layout cellview to use as the source cellview.
The Layout Cellview drop-down list shows all the layout cellviews open in Layout XL that have a corresponding connectivity reference available, including any cellviews that are open in read-only mode.
The source cellview that you select is automatically brought up. -
In the source cellview, select the individual component or select the components within an area and choose the Update From Selected command in the Generate Clones form.
The layout components you selected as the clone source and their schematic counterparts are displayed in the appropriate fields in the Clone Source group box. -
In the Search group box, choose whether to search for the target clone in the entire Schematic or Layout or within the Selected Set Only.
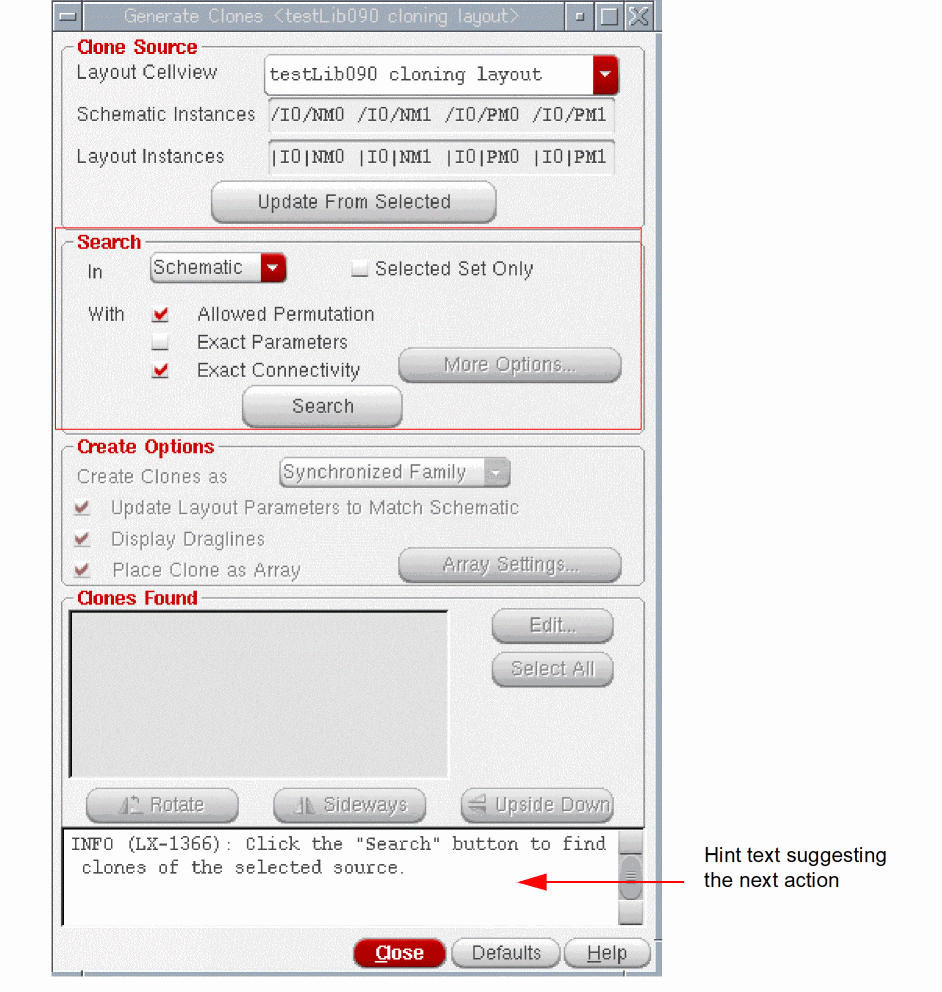
- Choose the search criteria Allowed Permutation, Exact Parameters, and Exact Connectivity, as appropriate.
-
Click Search to find the matching target structures in the design.
Depending on the design situation.- If the search is run in the schematic and Selected Set Only is deselected, the clone search ignores any devices that are already implemented in the layout.
- If the search is run in the schematic and Selected Set Only is selected, the clone search ignores any devices that are not selected in the schematic or that are already implemented in the layout.
- If the search is run in the layout and Selected Set Only is deselected, the clone search ignores any devices that are not yet implemented in the layout. In addition, the search ignores any devices that are implemented in the layout but placed inside the PR Boundary.
-
If the search is run in the layout and Selected Set Only is selected, the clone search ignores any instances that are not selected in the layout. Selected instances placed inside the PR Boundary are not ignored.
Irrespective of the design situation, as listed above, devices that are part of a modgen constraint in the schematic are ignored during the clone search.
The matching targets are added to the Clones Found list at the bottom of the form, as shown in the figure below.
If the search is likely to take a long time, you will see a pop-up inviting you to do one of the following.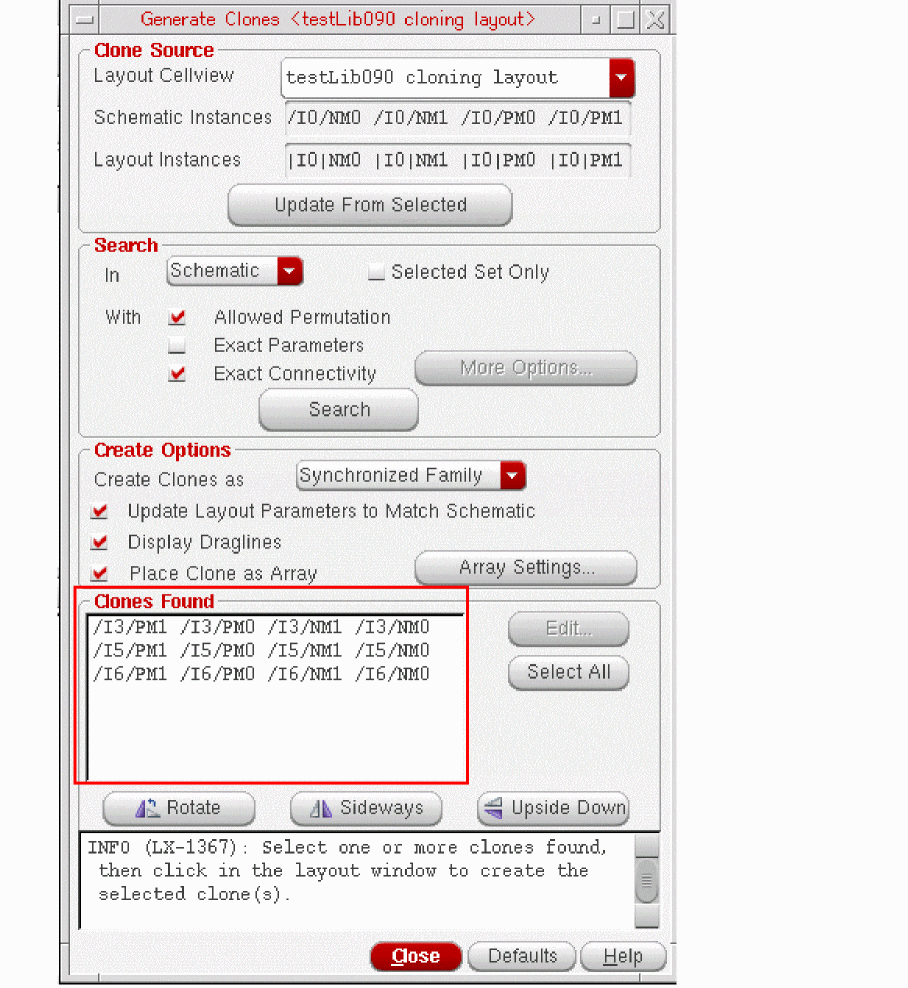
- Click OK to continue the search.
- Click Cancel to return to the Generate Clones form where you can tighten the criteria either by reducing the search area or by requesting only exact matches.
-
Press
Ctrl-cto stop the search. The system may take a few minutes to respond. The matches that were already found are not removed from the list of Clones Found.
-
Choose from Free Objects, Grouped Objects, and Synchronized Family from the Create Clones as pull-down list and select the other Create Options, as appropriate.
If you choose to display draglines, see Changing the Appearance of Draglines.
If you choose to place the clones as an array, see Clone Placement as an Array. -
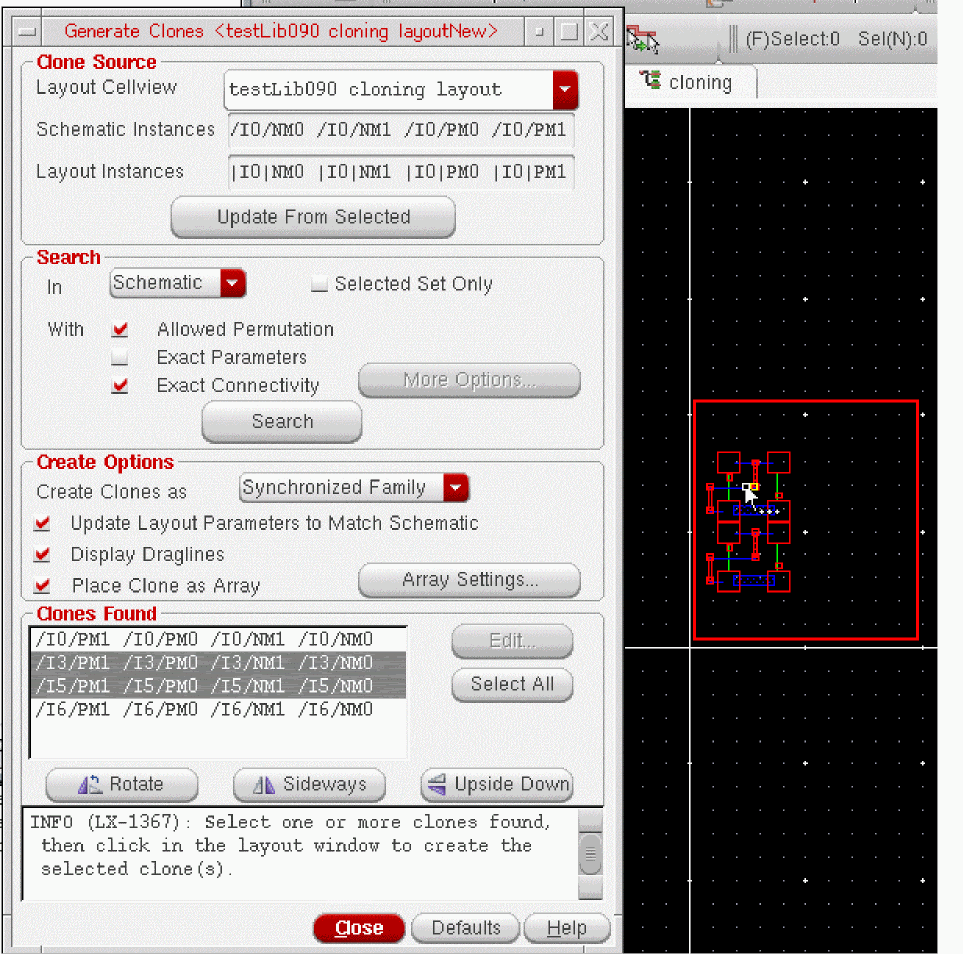
Select one or more devices from the list of Clones Found and move your cursor into the layout canvas.
An image of the clones to be generated follows your cursor, as shown in the figure below.
-
Select the orientation options you want (Rotate, Flip Horizontal, Flip Vertical) and click in the layout canvas to place the clone at the required location.
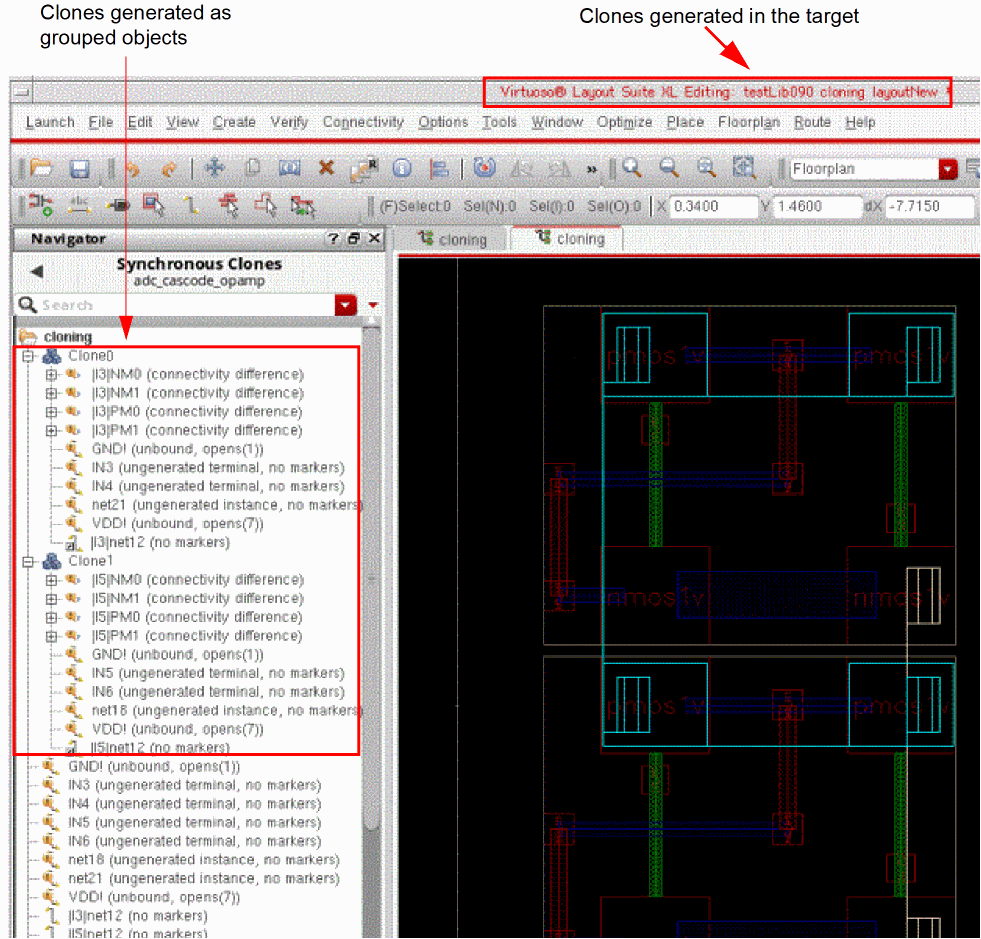
The target clones are generated in the target layout canvas as grouped objects and you can verify this by using the Navigator assistant, as shown in the figure below.
Related Topics
Exact and Non-Exact Matches for Cloning
Clone Constraint (RAK)
Return to top