Adding Assistant Panes and Toolbars to a Workspace
You can add assistant panes and toolbars to your workspace using the Window menu or a right-click menu.
To add an assistant pane or toolbar to your custom workspace using the right-click menu:
-
Right-click the title bar of an assistant pane or a toolbar.
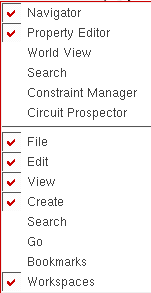
A menu of those assistant panes and toolbars available to the current application/view type appears. Active items appear with a check mark to the left of their names.
-
Select an item that is not currently active which mean the item does not display a check mark to the left of its name.
The item appears in your workspace. If you display the right-click menu again, you see a check mark next to the item.To add a toolbar to your custom workspace using the Window menu: -
Choose Window – Toolbars.
A submenu of toolbars you can configure for the current application/view type appears. Active toolbars appear with a check mark to the left of their names.
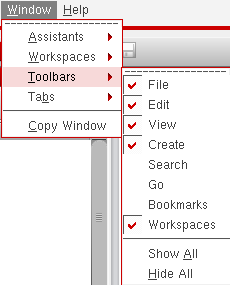
- Select a toolbar name that is not currently active.
To add an assistant pane to your custom workspace using the Window menu:
-
Choose Window – Assistants.
A submenu of assistant panes you can configure for the current application/view type appears. Active panes appear with a check mark to the left of their names.
The Assistants menu entry is not available in the Virtuoso Schematic Editor L.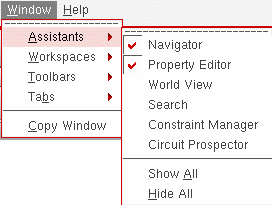
-
Select an assistant pane that is not currently active.
The pane appears in your workspace. A check mark appears next to the pane name If you display the submenu again.
Related Topics
Modifying the Size and Location of an Assistant Pane
Return to top