Run Settings for SignOff Fill
Click the SignOff Fill tab to define the run settings for SignOff Fill.
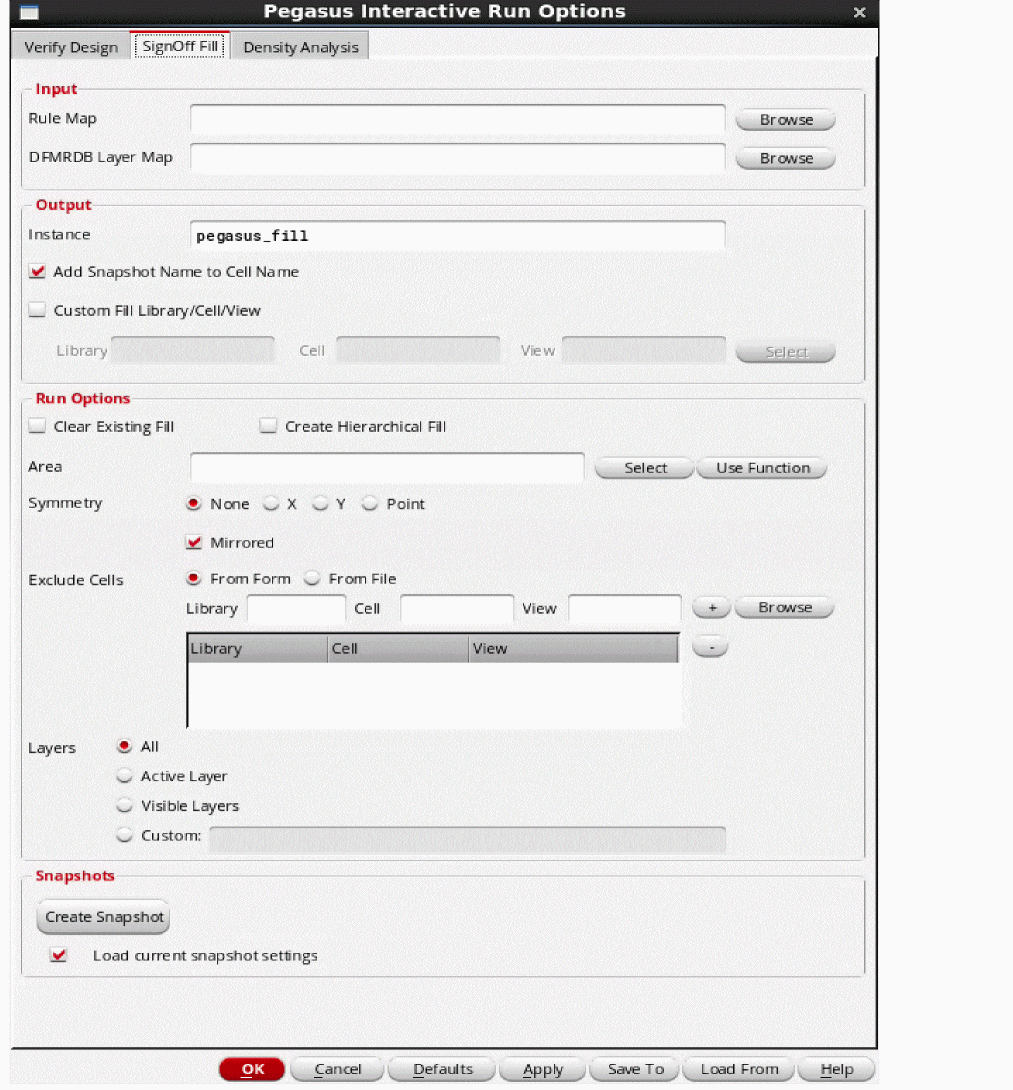
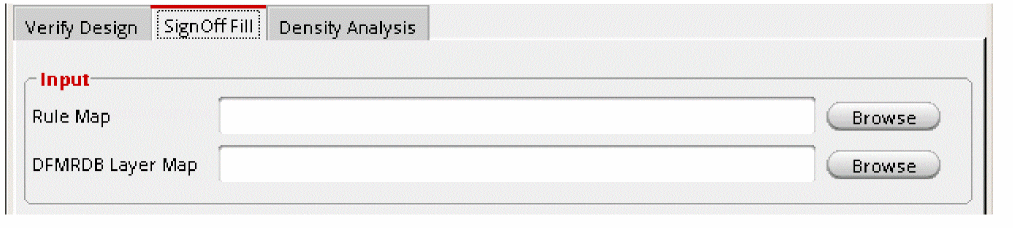
Input Section
-
Rule Map: Enter the name of the sign-off rule map file or click Browse to select it. Use this file when fill rule deck uses the
outputPVL command to output metal fills. The syntax of the file is:<rulename> dfII_layer dfII_purpose
Example:fill.rul
…
rule m1_fill_output { copy m1_fill }
output -drc m1_fill_output -gds 15 35 fill.gds -output all
rule m2_fill_output { copy m2_fill }
output -drc m2_fill_output -gds 17 35 fill.gds -output all
rulemap.file:
m1_fill_output Metal1 fill
m2_fill_output Metal2 fill
- DFMRDB Layer Map: By default Pegasus Interactive SignOff fill uses technology layermap file to read generated dummy fills and map them into Virtuoso to specific layer/view purpose. You can redefine it using this field.
Output
-
Instance: Specifies prefix of instance name of fill cell. Pegasus Interactive fill puts all generated fills into specific cell and then inserts this cell as instance into the block. Use this field to redefine instance name prefix. Default instance name prefix is
pegasus_fill. Full instance name is<prefix>_RUN_FILL. -
Add Snapshot Name to Cell Name: Select the check box to add the snapshot name to the name of the cell with generated fills as secondary prefix. When enabled, the fill cell name is
pegasus_fill_<snapshot name>_<original cell name>. - Custom Fill Library/Cell/View: Select the check box to customize the library, cell and view of the cell with generated fills.
Run Options
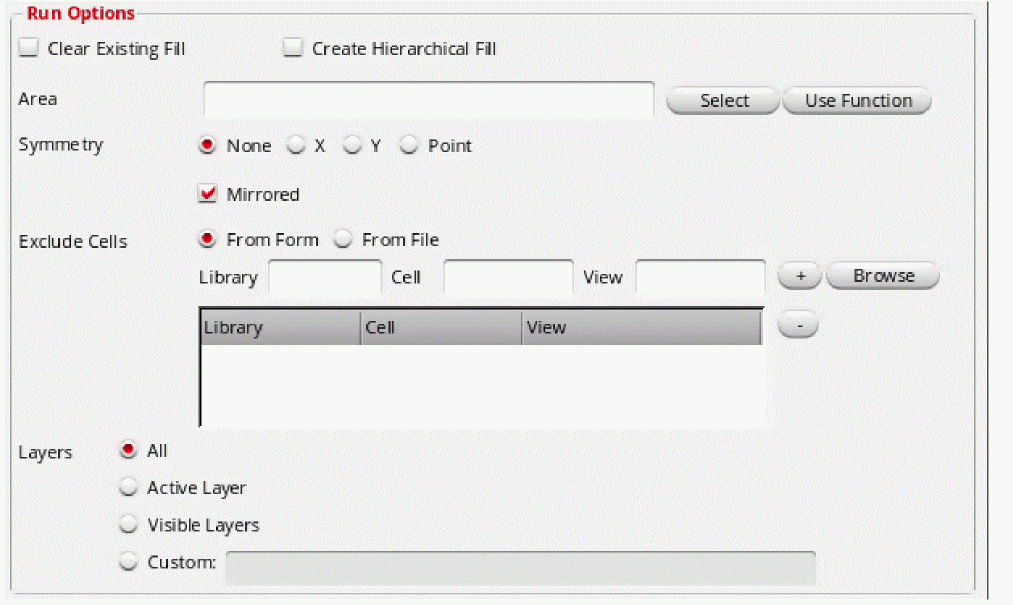
- Clear Existing Fill: Select the check box to delete fills, generated by previous SignOff Fill runs before the new run. The tool deletes existing fills, generated by previous SignOff Fill runs. Do not select the check box to retain existing fills in each new run.
- Create Hierarchical Fill: Select the check box to create Hierarchical fills.
-
Area: Enter the coordinates or click Select to generate dummy fills for the specified area. Dummy fills will not be generated outside this specified area. You can define
pgssUserSelectedFillArea()function to select area to fill. If you have defined this function then clicking on the Use Function button fills the area field with already defined coordinates. If you have not defined the function then an error message is displayed. -
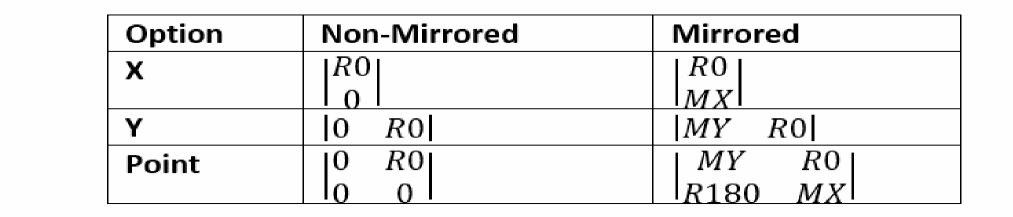
Symmetry: Select the symmetry value from the following options based on which the fill shapes will be generated. To use any option other than None, the Area option must be selected. If the Area option is not selected and area is not defined, an error message is displayed.
- None: This is the default mode. No symmetry operation will be performed in this case.
- X: When X is specified, the symmetry operation is performed along the X-axis.
- Y: When Y is specified, the symmetry operation is performed along the Y-axis.
- Point: When point is specified, the symmetry operation is performed along the axis point.
-
Mirrored: When you select Mirrored check box, the X, Y, and Point options perform Mirrored symmetry operation. The following figure shows the result of mirrored and non-mirrored Symmetry option result:
- Exclude Cells: Use this option to exclude cells from fill insertion. The Exclude Cells option is similar to the Exclude cells option of Run Settings for Verify Design. For detailed description, see: Exclude Cells.
-
Layers: Use this option to define layers to be used in the run.
- All: Select this radio button to process all layers.
- Active Layer: Select this radio button to perform the run on the currently active layer on Virtuoso layer palette.
- Visible Layer: Select this radio button to generate dummy fills for layers, which are visible on Virtuoso layer palette.
-
Custom: Select this radio button to generate dummy fills for the custom layers defined in the text box. The syntax for specifying layer in the Custom layer field is the following:
<layername> ... <layername>
Wildcards are supported.
Example 1:Metal1
Fills will be generated forMetal1layer.
Example 2:Metal1 Metal2 Metal3
Fills will be generated forMetal1,Metal2, andMetal3layers.
Example 3:Metal*
Fills will be generated for all layers, which start withMetal.
Return to top