Label Generation for Overlapping Shapes
The way labels are generated for overlapping shapes vary in manual and auto modes selected in the Create Label form.
Manual Mode
-
When the Label Layer/Purpose field is set to Use current entry layer or Select layer: If the click point or intersection point of scan line lies on overlapping shapes, a single label is created at the click or intersection point. The label is created on the layer-purpose pair that is the current entry layer in the Layers panel or on the one that you select from the Select layer list. Single label string is consumed from the Label (Pattern) field.
You can move the shapes to confirm that only one label is created.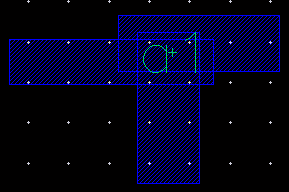
-
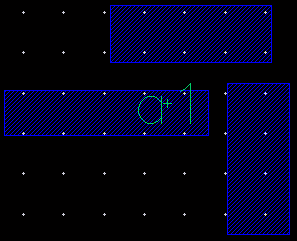
When the Label Layer/Purpose field is set to Use same layer as shape, select purpose or Auto (Using stampLabelLayers section from technology file): If the click point or intersection point of scan line lies on overlapping shapes, multiple labels are created at the click or intersection point. One unique label is created on each layer-purpose pair. The following figure illustrates this when the Label Layer/Purpose is set to Use same layer as shape, select purpose. The two shapes in blue are on the
metal1layer and the red shape is on themetal2layer.
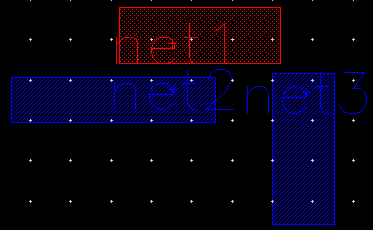
If you move the shapes, you will notice that the labels are created on the same layers as shapes. However, since there are two shapes on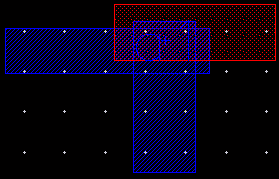
metal1, only one label is generated for the two shapes.
Auto Mode
-
When the Label Layer/Purpose field is set to Use current entry layer or Select layer: Separate labels are generated for overlapping shapes. The label name for each corresponds to the net name associated with the respective overlapping shape. Multiple labels with different label names overlap at the click location. The overlapping labels attach to the respective overlapping shapes by default. The labels are created on the layer-purpose pair that is the current entry layer in the Layers panel or on the one that you select from the Select layer list.
Move the shapes to see that each shape has been labeled with its net name and all labels are created on the same layer-purpose pair.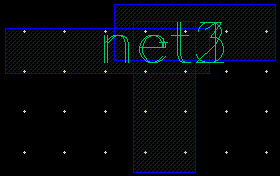
If the shape you click or the shape that intersects the scan line does not have connectivity information, no label is assigned to the shape and a warning message is generated in the CIW.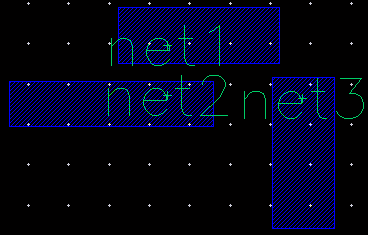
-
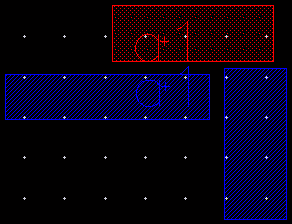
When the Label Layer/Purpose field is set to Use same layer as shape, select purpose or Auto (Using stampLabelLayers section from technology file): Separate labels are generated for overlapping shapes with the label names corresponding to the net name associated with the respective overlapping shapes. The labels are created on the same layer as the shapes if you select Use same layer as shape, select purpose, as shown in the following figure.
Move the shapes to see that each shape has been labeled with its net name and all labels are created on the same layer-purpose pair.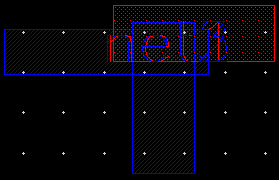
Small labels, less than
4 pixels, are not displayed in the design. To view small labels, you can enable the drawSmallLabelOriginYou can create and attach a label to an object inside a figure group if you are in Edit In Place (EIP) mode or the transparent group option is ON. You can create and attach a label to an object inside a figure group in the following scenarios:
- If you create a label on an object inside the figure group and attach it to the target object
- If you click an empty area outside the figure group and attach the label to a target object inside the figure group
Related Topics
Configuring Label Creation Options
Generating Labels Using the Scan Line
Generating Labels Using Auto Step in Manual Mode
Return to top