Adding a Probe using the Right Mouse Button
To probe an object by using the Probing commands available in the right-mouse button shortcut command:
-
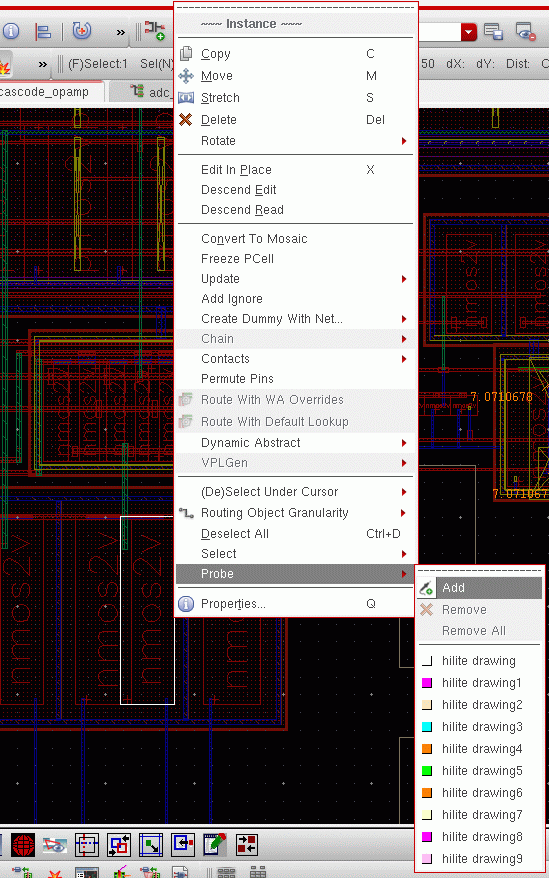
Select the object in the canvas or the navigator and click the right mouse button.
A shortcut menu appears displaying the probing options.
-
Click Add.
A colored probe is added to the selected object in the layout view. A similar, corresponding probe is also added in the schematic view.
To probe an object only in the schematic view, you must select the object in the schematic navigator.
The new probe you added also displays in the Navigator assistant.
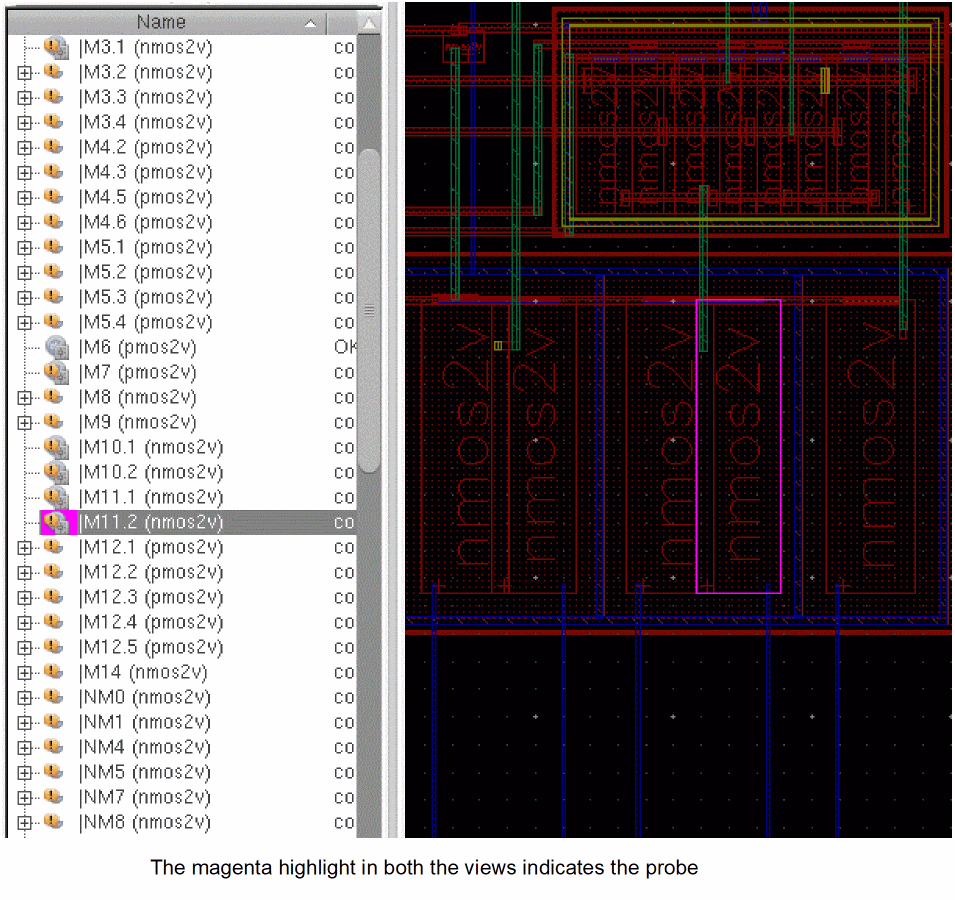
The Navigator assistant not only displays new probes added in the canvas, but you can also use it to add new probes to the design. In fact, a probe you add to a higher level in the navigator tree automatically applies to the lower levels also. Therefore, you can use the Navigator assistant for probing objects across the design hierarchies. This implies that probing a net at any level in the hierarchy will probe that net anywhere else it appears in the navigator, up or down the tree.
A probe on a lower instance will probe itself “up” the way. So, if instance I2, lies within instance I1; a probe you place one I2 will automatically propagate “up” to display itself on I1 also.
To probe an object, select the Navigator tree object you want to probe and click the right mouse button. From the options displayed, select the appropriate probing command.
The right mouse button probing options displayed in the Navigator tree are the same as those displayed in the canvas. Depending on the hierarchical level you select, the probe may be applied across the levels in a design. However, only probing an object at the current level of hierarchy will cross probe in the schematic. Probing at any other level of the hierarchy will only probe the layout.
- To add a probe in a specific color, select Probe - hilite drawing<number> from the color palette in the right mouse button menu.
- If you want the tool to automatically display subsequent probes in different colors, select the Options - Highlight command. Under the Display Layer section, select the Cycle check box. This ensures that any new probes added take their color from the palette. The first probe added gets the color at the top of the palette. Any subsequent probes added, get the color next in the sequence.
- If you want all the new probes to appear in a specific color, you must uncheck the Cycle option and specify the color to be used for the highlight.
- To modify a highlight color of an existing probe, you must first select the object from which the probe originates. Then, select an appropriate color from the palette in the right mouse button menu. To identify the object from which a probe originates, you can view the tooltip information on the probed object.
Related Topics
Object Probing Using the Right Mouse Button
Return to top