Defining a Mixed Design Partition
To define a mixed design partition:
-
Click Define Design Partition on the Concurrent Layout assistant or choose Concurrent – Define Design Partition.
The Define Design Partition form appears. - (Optional) Specify a name for the new design partition in the Partition Name field.
- Click Add.
- Attach an area to the selected design partition by doing one of the following:
- (Optional) Click Update to apply changes if you make any further adjustments.
- In Layers, deselect All.
-
Specify the top and bottom layers to be included in the design partition in the Layers field.
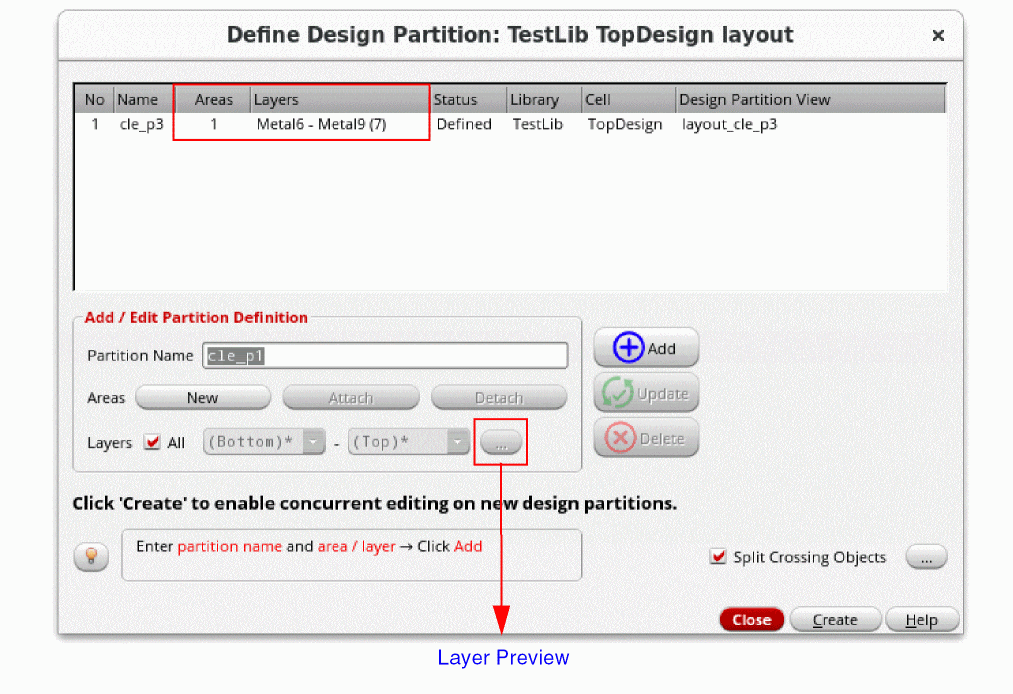
- (Optional) Click Layer Preview to open the Partition Layers form and remove certain layers from the layer range or add other visible layers from the Palette.
-
Click Create.
A message box appears listing the design partitions that will be created. -
Click OK.
- Design partition views are created and the status Created is displayed in the Defined Design Partition form and the Concurrent Layout assistant.
- The top design is saved.
- Objects crossing the design partitions are split at the boundary. This happens because the Split Crossing Objects option is selected by default.
- Click Close to exit the Define Design Partition form.
Related Topics
Defining an Area-Based Design Partition
Defining a Layer-Based Design Partition
Return to top