Defining an Area-Based Design Partition
To define an area-based design partition:
-
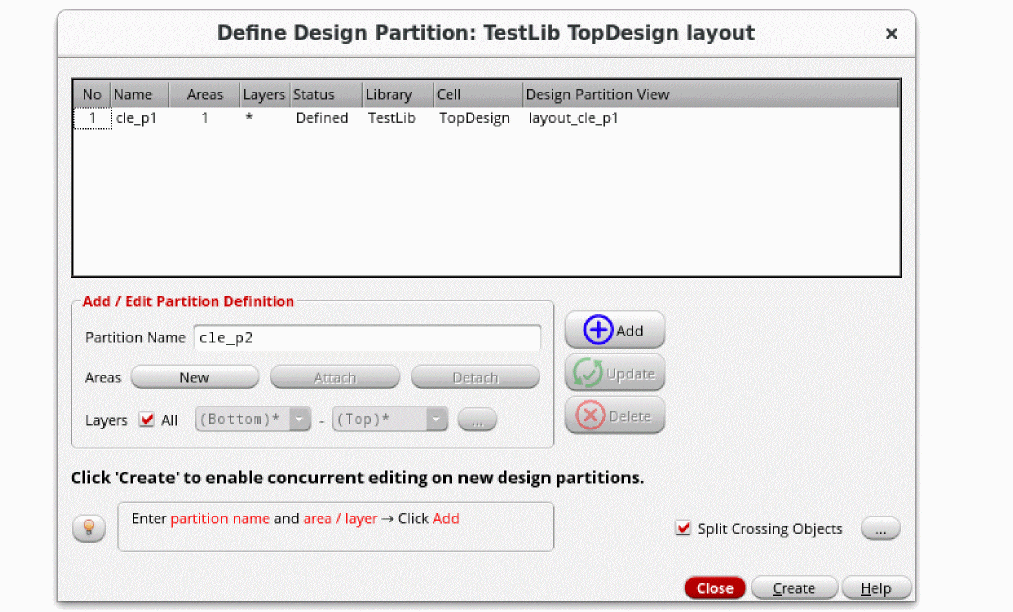
Click Define Design Partition on the Concurrent Layout assistant or choose Concurrent – Define Design Partition.
The Define Design Partition form appears. -
(Optional) Specify a name for the new design partition in the Partition Name field.
If you do not specify a name, the default name in this field is used. By default, the names of the new design partitions and the corresponding design partition views arecle_px andlayout_cle_px, where x is a number. -
Click Add.
A design partition with corresponding design partition view is added.
The status of the new design partition is Defined. If a design partition view already exists the status is Reuse.
- (Optional) Click Add again to add more design partitions.
-
(Optional) Select a design partition, specify a different name in the Partition Name field and click Update.
- If the design partition is not yet created, which means its status is Defined, rename the design partition name and click Update.
- If the design partition is already created, rename the design partition name, and click Update. Design partition view name will update automatically. The status of the design partition will change to Reuse.
-
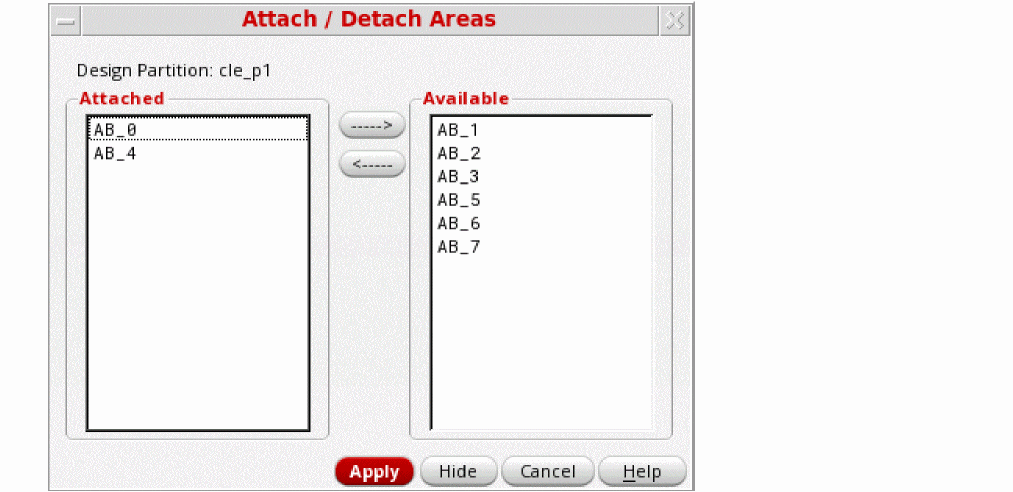
Attach an area to the selected design partition by doing one of the following:
- Select the area boundary and then click the Attach button for the Areas option.
- Click Attach and then select area boundaries on the canvas to attach.
(Optional) PressF3to display the Attach / Detach Areas form for further assistance.
-
(Optional) Click Update to apply changes if you make any further adjustments.
If you use the chop command to edit the area boundary, the existing area boundary is deleted and detached from the design partition. You will have to attach the new area boundary again. -
(Optional) Click the button next to the Split Crossing Objects option to display.
The Split Crossing Objects Options form is displayed. Use this form to change the settings of how crossing objects are handled when the design partitions are created.
-
Click Create after you have completed defining all the design partitions.
A message box is displayed informing you about the design partitions that will be created. -
Click OK.
- Design partition views are created and the status Created is displayed in the Defined Design Partition form and the Concurrent Layout assistant.
- The top design is saved.
- Objects crossing the design partitions are split at the boundary. This happens because the Split Crossing Objects option is selected by default.
-
Click Close to exit the Define Design Partition form.
In the Design Management environment, an additional dialog box is displayed to confirm that new design partition views have been checked into the design management system. -
(Optional) Open the Library Manager to review the created design partition views and observe the changes.
The created design partition views are of minimal size. This is because only the changes made to the associated design partition are saved in this view.
Related Topics
Defining a Layer-Based Design Partition
Defining a Mixed Design Partition
Colors that Identify Objects in an Area-based Design Partition
Concurrent Layout Assistant in Designer Mode
Concurrent Layout Options Form
Edit Scope of a Design Partition
Permission Required to Open a Design Partition View
Split Crossing Objects Options Form
Return to top