6
Pin Group Guides
Virtuoso® Floorplanner lets you create pin groups and assign pin constraints to these groups. This feature is useful for designs with a large number of pins, such as mixed-signal designs, where it would be difficult and time-consuming to create pin constraints on individual pins. You can create pin groups, assign them to full or partial edge(s), and apply process constraints, such as layer range and spacings, to the entire pin group through a dedicated pin group guide constraint.
- comprises one or more pins and may have one or more pin group guides.
- is a placement constraint for the pin group, and is defined on partial or complete edges of blocks.
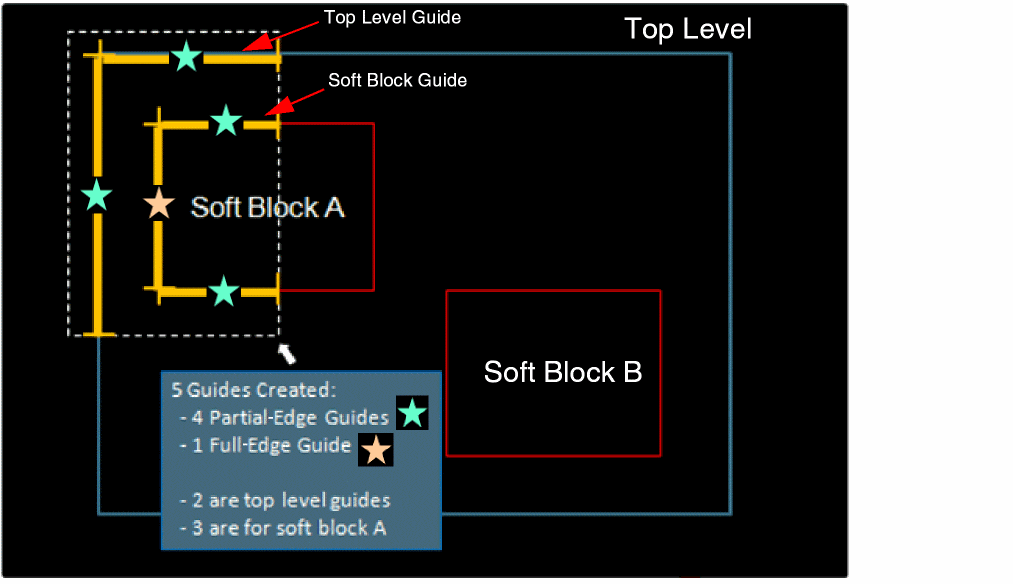
Pins are placed on the pin group guides. In the following example, one full-edge pin group guide and four partial-edge pin group guides are created.
Use the options in the Pin Group Guide form to create and edit pin group guide constraints. These constraints are created in the Virtuoso constraint system. Therefore, you can use the Virtuoso Constraint Manager assistant to verify and further customize these constraints. In the following snapshot, the Constr_2 pin group constraint is selected in the Constraint Manager assistant and its attributes are displayed in the Property Editor. The Constr_2 pin group guide constraint comprises pins B:B and C:C, and a pin guide B__1.
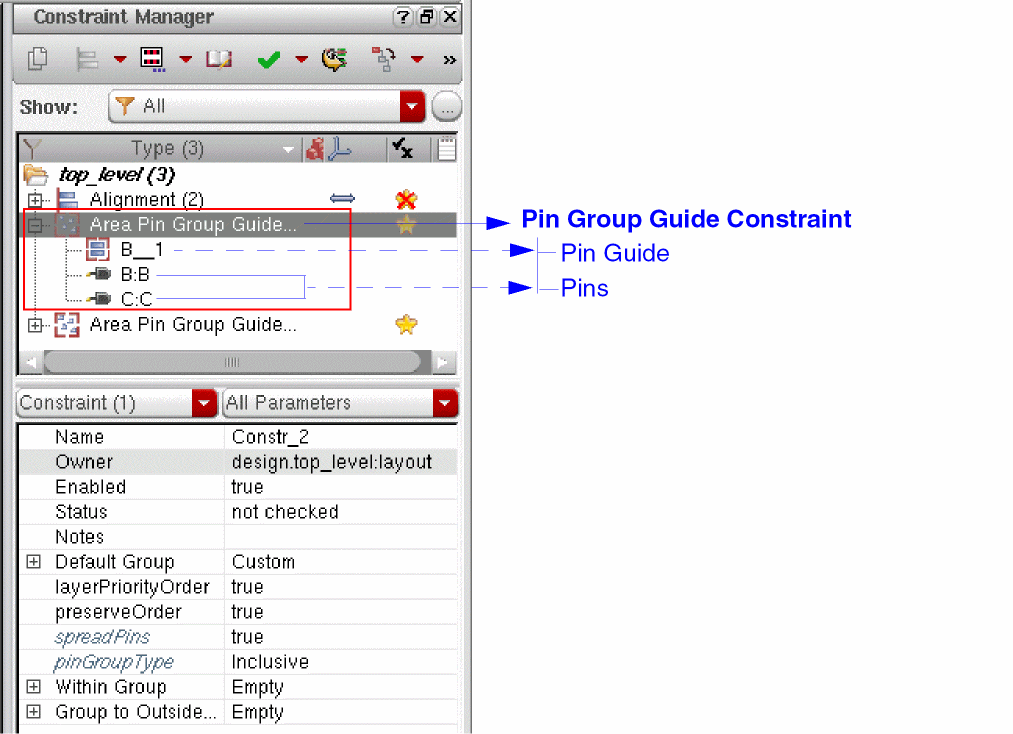
The pin group guide constraint selected in the Constraint Manager assistant is highlighted in the layout design.
After creating the pin group guide constraints, you need to run the Pin Optimizer to achieve the final pin placement. The Pin Planner and Pin Optimizer honor the pin group guide constraints. The Pin Optimizer places the pins accordingly, while maintaining design correctness.
Related Topics
Placing Pin Group Guides Based on Schematic or Symbol Views
Return to top