Creating a Free Area Pin Group Guide
You can use the Free Area option on the Guides tab to place pins in the free area within the PR boundary of the top level or instance level (level-1) from the top level.
To create a free area pin group guide:
-
Choose Floorplan – Pin Group Guides – Create.
In Layout EXL and higher tiers, choose Plan – Pin Planning – Create/Edit Pin Group Guide.
The Pin Group Guide form appears. -
Specify the name of the new pin group guide in Group Name field or click New to generate a unique group name.
You can edit the automatically-generated group name. - Draw the pin group guide on the layout canvas using the options on the GUIDES tab.
-
Select Free Area on the Guides tab.
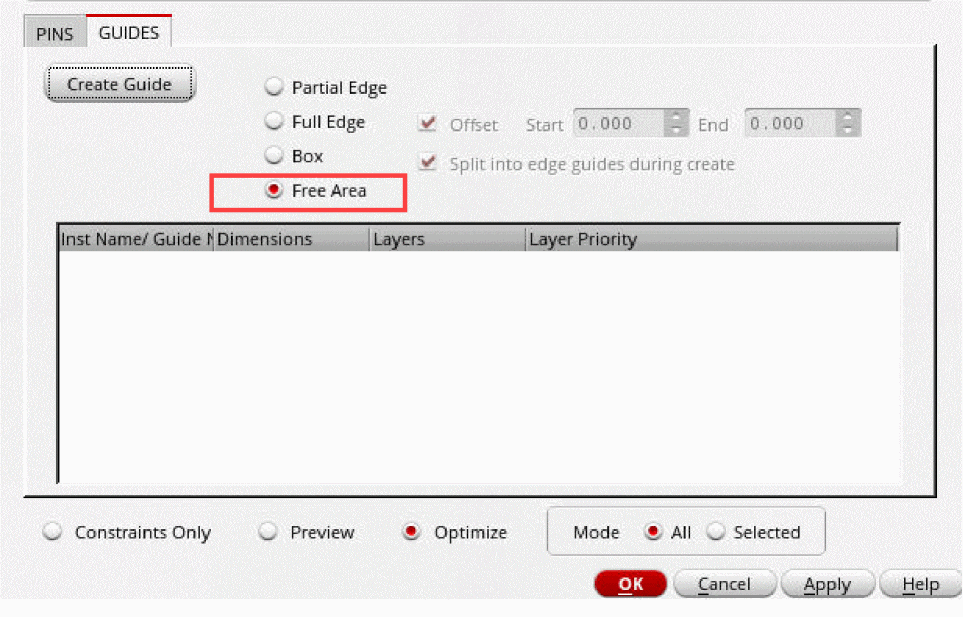
- Click Create. By default, you can create polygonal guides.
-
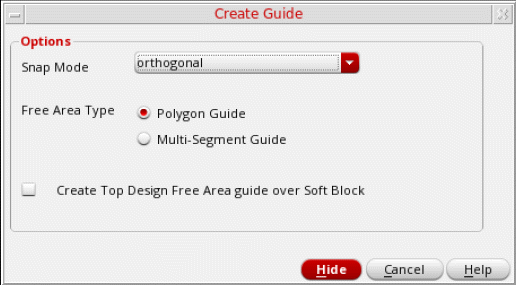
Click
F3to open the Create Guide form.
-
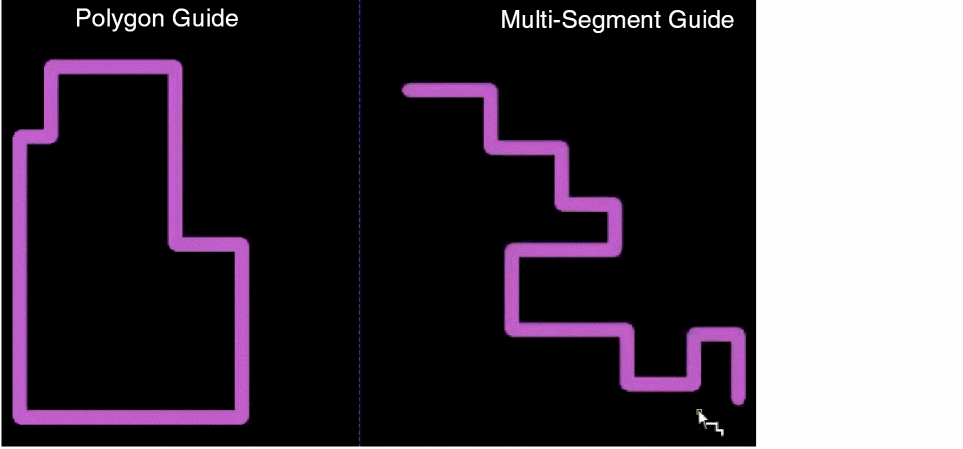
Select a Free Area Type, which indicates the shape of the guide that you want to create. The following image shows the differences between polygonal and multi-segment guides.
- Select Create Top Design Free Area guide over Soft Block to create top-level (level-0) guides over soft blocks. By default, if soft block pins are added on the Pins tab, then a level-1 guide is created.
- Click Hide.
-
Draw the required shape for the free area pin group guides.
Free area pin group guides must be completely enclosed within the PR boundary of the block. -
Either press
Enteror double-click to indicate the end point.
For polygonal guides, the polygon is auto-completed. Polygons should contain at least four vertices.
For multi-segment guides, double-click or enter indicates the end point.
Free area pin group guides must not overlap (partially or completely) with any boundary. If there is an overlap, the pin group guide is not created and a warning message is displayed in the CIW.
A free area pin group guide as per your specifications is created.
Related Topics
Interactive Guide Creation for a Pin Group Guide
Return to top