Reinitializing a Floorplan
You can use the Reinitialize command to alter the state of different design objects simultaneously. The Floorplan – Reinitialize command makes a collection of design objects based on their cell type and places them around the design boundary. By default, the Reinitialize command is run just after Generate Physical Hierarchy, however, it is not mandatory.
-
Choose Floorplan – Reinitialize.
In Layout EXL and higher tiers, choose Plan – Generate – Reinitialize.
The Reinitialize Floorplan form is displayed as shown in the graphic.
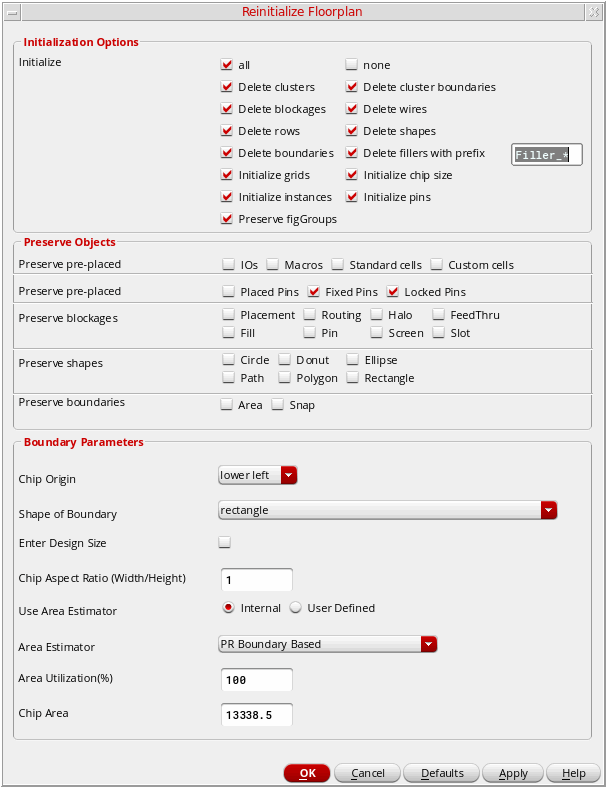
- In the Initialization Options section, select the options to reinitialize or retain the existing values of the various design objects: all, none, Delete clusters, Delete cluster boundaries, Delete blockages, Delete wires, Delete rows, Delete shapes, Delete boundaries, Delete fillers with prefix, Initialize grids, Initialize chip size, Initialize instances, Initialize pins, and Preserve figGroups.
-
In the Preserve Objects section, select Preserve pre-placed to selectively preserve the locations of the pre-placed I/Os, macros, standard cells, and custom cells.
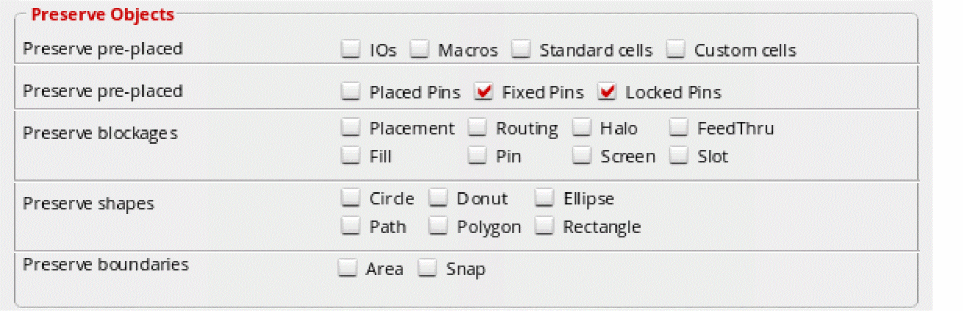
- Select Preserve pre-placed to selectively preserve the location of pre-placed pins, fixed pins, and locked pins. By default, fixed and locked pins are preserved.
- Select Preserve blockages to selectively preserve the Placement, Routing, Halo, Feedthru, Fill, Pin, Screen, and Slot blockages.
- Select Preserve shapes to selectively preserve the Circle, Donut, Ellipse, Path, Polygon, and/or Rectangle shapes.
- Select Preserve boundaries to selectively preserve the Area and/or Snap boundaries in a design.
-
In the Boundary Parameters section, specify the options to modify the boundary parameters. The section of the form appears as shown below.

- Select Chip Origin to specify the point of origin of the bounding box of the rectangle’s boundary as lower left or center.
- Select Shape of Boundary to specify the boundary as rectangle or polygon. You can create a rectangular design boundary by:
- Select the Enter Design Size to specify the width and height of the rectangle.
- Select Chip Aspect Ratio (Width/Height) to specify the width-to-height ratio for the chip. The default value is 1.0. This option is available only when Enter Design Size is deselected.
- Select Use Area Estimator to specify the area estimator that you want to use.
- Select Area Estimator to use to estimate the area required by the chip.
- Select Chip Area to display the value of the area calculated by the area estimator. You can manually specify the area in this field. The value of this field will be used to calculate the final chip width and height.
- Click OK or Apply.
Related Topics
Area Estimation Framework in Floorplanner
Return to top