Specifying LPP and Pin Layers in Push Into Blocks
To specify LPP and Pin Layers in Push Into Blocks:
-
Choose Floorplan – Soft Block Update – Push Into Blocks. The Push Into Blocks form appears.
In Layout EXL and higher tiers, choose Plan – Block Planning – Push Into Blocks. - Select the required soft block instances if soft blocks were not selected before invoking the form.
- Edit the Target Lib, Target Cell, and Target View values directly in the table as per your requirement.
-
In the LPP Filter section, specify the layers that can be pushed into soft blocks.
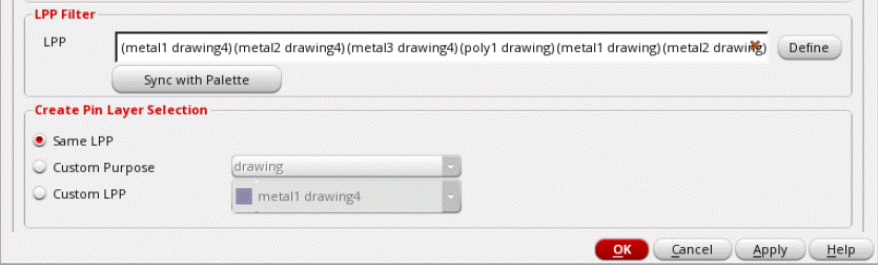
- Click Define to display the LPP Selection dialog box. By default, all LPPs are selected.
- De-select the LPPs in which shapes are not to be pushed.
- Close the LPP Selection dialog box.
- Click Sync with Palette to filter LPPs based on their selectability settings in the Palette assistant. Only the LPPs that are selectable in the Palette assistant are selected.
- In the Create Pin Layer Selection section, select Same LPP to specify that pins are to be created on the same layers and purposes as the source pin shapes.
- Select Custom Purpose to create pins on the same layers as the source pin shapes and allows you to specify the purpose.
- Select Custom LPP to specify the layer and purpose on which pins are to be created.
- Click OK.
The top-level power structures are pushed to the block level.
Related Topics
Pushing Top-level Power Structures into Soft Blocks
Return to top