Specifying Shapes and Nets in Push Into Blocks
To specify shapes and nets in Push Into Blocks:
-
Choose Floorplan – Soft Block Update – Push Into Blocks. The Push Into Blocks form appears.
In Layout EXL and higher tiers, choose Plan – Block Planning – Push Into Blocks. - Select the required soft block instances if soft blocks were not selected before invoking the form.
- Edit the Target Lib, Target Cell, and Target View values directly in the table as per your requirement.
-
In the Options – Shapes & Wires section, select Push Whole Shape to specify that whole shapes that overlap the selected soft block must not be clipped when they are pushed inside the blocks.
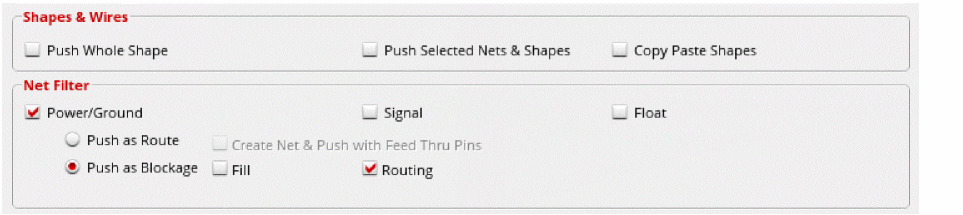
- Select Push Selected Nets & Shapes to push only the selected nets and shapes inside the soft block.
-
Select Copy Paste Shapes to push shapes into the target level without deleting them from the top level. Therefore, top-level shapes are retained as they are.
- In the Net Filter group box, select the net shapes to be pushed into the selected soft block.
- Select Power/Ground Net(s) to select the net shapes that are connected to power and ground pins.
- Select Signal to select the net shapes that are connected to signal pins.
- Select Float to select all floating shapes, which are shapes without any connections.
- Select Push as Route to automatically push all shapes into the selected soft blocks.
- Select Create Net & Push with Feed Thru Pins to create missing nets before pushing all shapes into the selected soft blocks.
- Select Push as Blockage to push all shapes as blockages. You can push fill and routing blockages at the same time using the Fill and Routing options.
- Click OK.
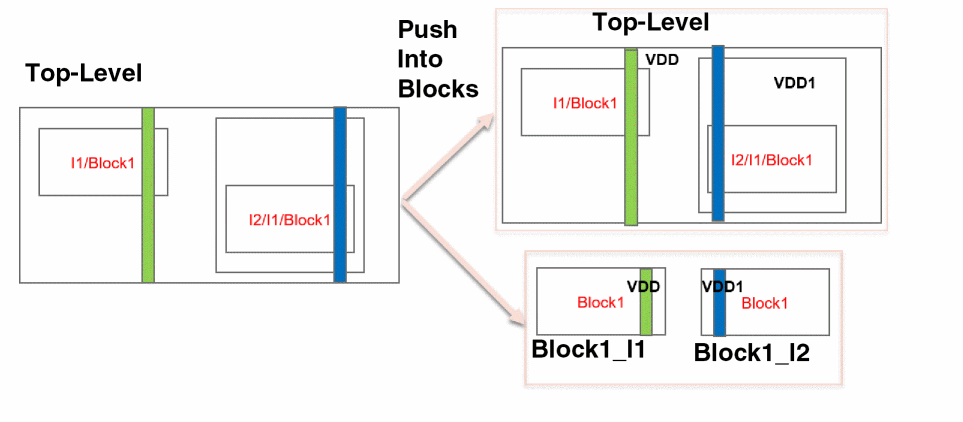
The top-level power structures are pushed to the block level.
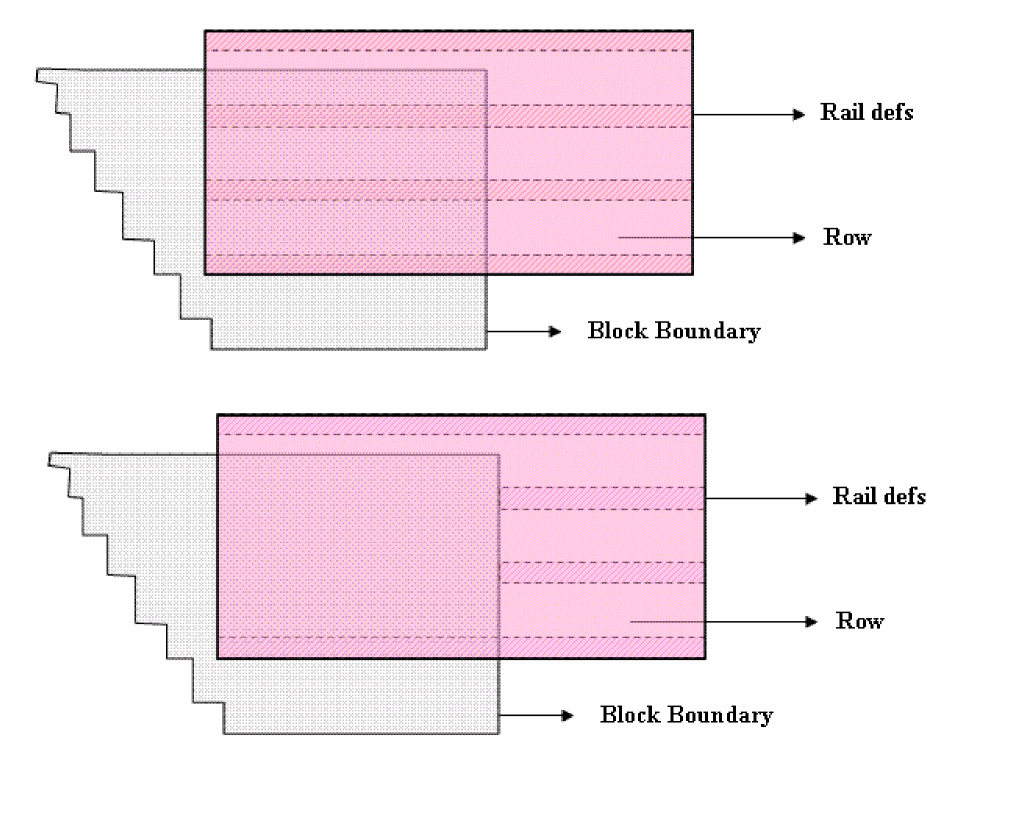
In case of custom rows, rail definitions and components of the row would also be pushed inside the boundary along with the row, as shown in the following figure.
Related Topics
Pushing Top-level Power Structures into Soft Blocks
Return to top