Select Via Form
The Select Via form consists of different layer stacks to show parallel connections. For example, layer LiPO can connect to Poly, Metal1, Li2. The displayed layer stacks and vias are defined in the active validLayers and validVias rule section in the technology file. Clicking the Options button in the Select Via form displays the Select Via Options form. The Select Via Options form enables the selection of a via cutClass and viaDef. The wire editor supports the use of the selected via cutClass. For more information about the cut class and the via definition values, see the Create Via Options Form.
The following table describes the fields available in the Select Via form.
| Field | Description |
|---|---|
|
Lets you select a layer on which you want to create a via stack |
|
|
Rotates the via cuts and swaps the rows and columns, if any, while rotating the via shape by 90 degree as you place or drag the via. You can also rotate pending vias by clicking the middle mouse button. However, the top and bottom via shapes are not rotated. This option is available both in Create Stranded Wire Form and Create Bus Context-Sensitive Menu. |
|
|
Enables you to align vias as they are digitized during wire or bus creation. You can choose to align a via either automatically or by selecting a custom alignment option. Vias are aligned between the edges of via enclosure shapes and the edges of the connecting wires on the same layer. For example, for a You can also access the via alignment options from the Create Stranded Wire Form. |
|
|
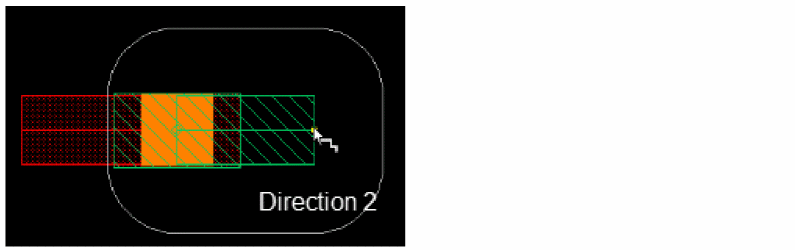
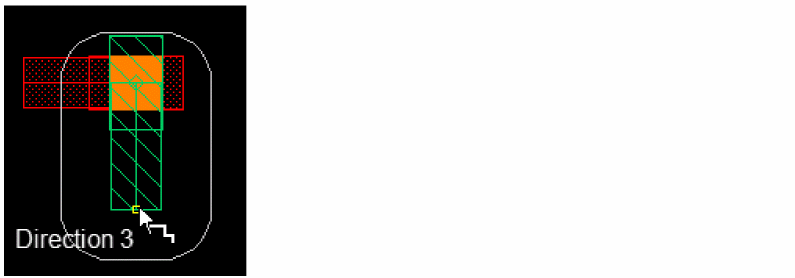
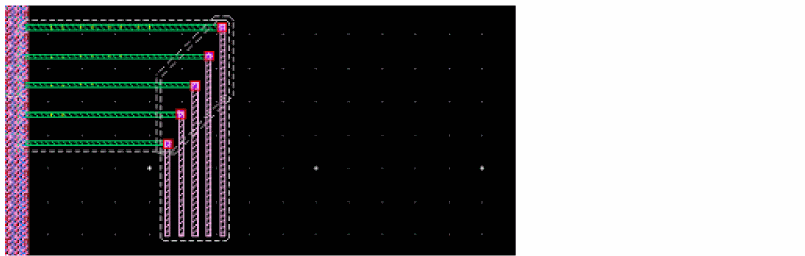
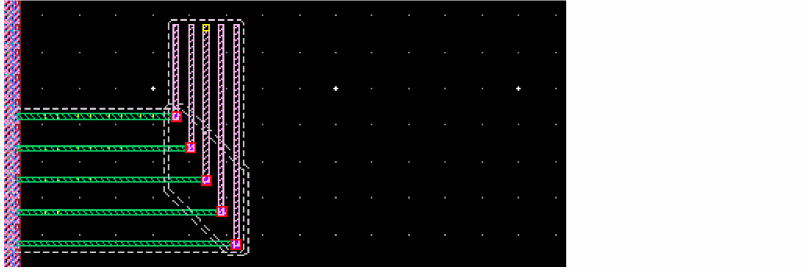
Automatically aligns the digitized via with respect to both the existing and the new pathSeg. By default, this check box is not selected. After you select the check box, it remains selected for the remaining session while you digitize more vias. When the check box is selected, the default alignment of the next via is calculated automatically. When the check box is not selected, the default alignment of the next via is Center Center (see Override option setting). Automatic via alignment is not supported while routing a bus. The following figures illustrate the automatic via alignment in three different scenarios based on the directions in which the next pathSeg of the wire is added. 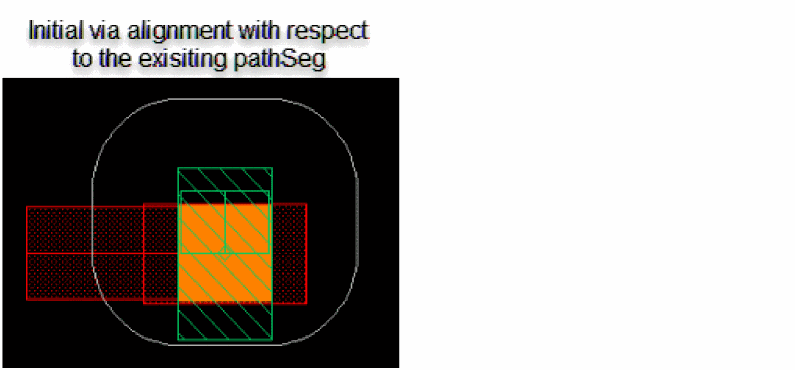 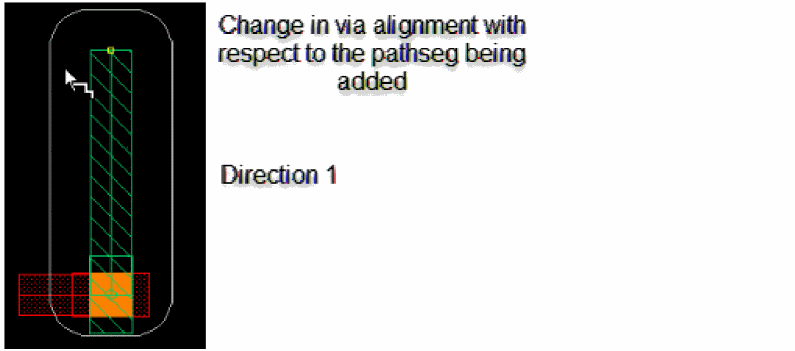 |
|
  |
|
|
Controls alignment behavior for orthogonal transitions.
Environment variable: autoViaAlignmentOrthoTransitionBehavior |
|
|
Controls alignment behavior for colinear transitions.
Environment variable: autoViaAlignmentColinearTransitionBehavior |
|
|
Enables you to specify a custom via alignment option that overrides the automatic alignment. The Override buttons are available only if you click a target layer button. Each Override button carries the image of two pathSegs—blue and red—and a rectangular via. The two pathSeg colors indicate two layers. You move the wire you are creating from one layer to the other after digitizing a via. The image on the button represents the alignment of the via with respect to the two layers. Clicking a button displays a check mark on the button; the check mark is cleared when you digitize a via with the selected alignment setting. The Center button is available only if the Automatic check box is selected. 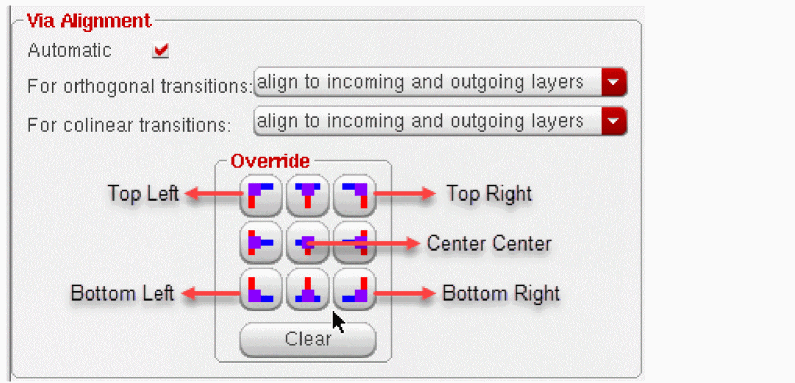 Environment variable: viaAlignment |
|
|
Removes the check mark displayed on the selected Override button. |
|
|
Helps you specify a pre-defined manner in which multiple vias can be added simultaneously when routing multiple wires. Environment variable: viaPattern |
|
|
|
Via patterns and Fan Out to Vias support both orthogonal and diagonal wire directions. |


Return to top