Setting up a Constraint on a Net
The Routing Constraint Manager lets you establish the design needs, save them as constraints, and share those constraints across specification and implementation to drive the accelerated layout solution with reduced errors. A constraint-driven design preserves the design intent by enabling efficient design collaboration. Using Routing Constraint Manager, you can create following constraints:
To set up a constraint on a net:
-
Choose Window – Assistants – Routing.
Alternatively, right-click anywhere on the layout window menu bar and choose Assistants – Routing.
The Routing assistant is displayed. -
Click Routing Constraint Manager
 on the Routing assistant toolbar.
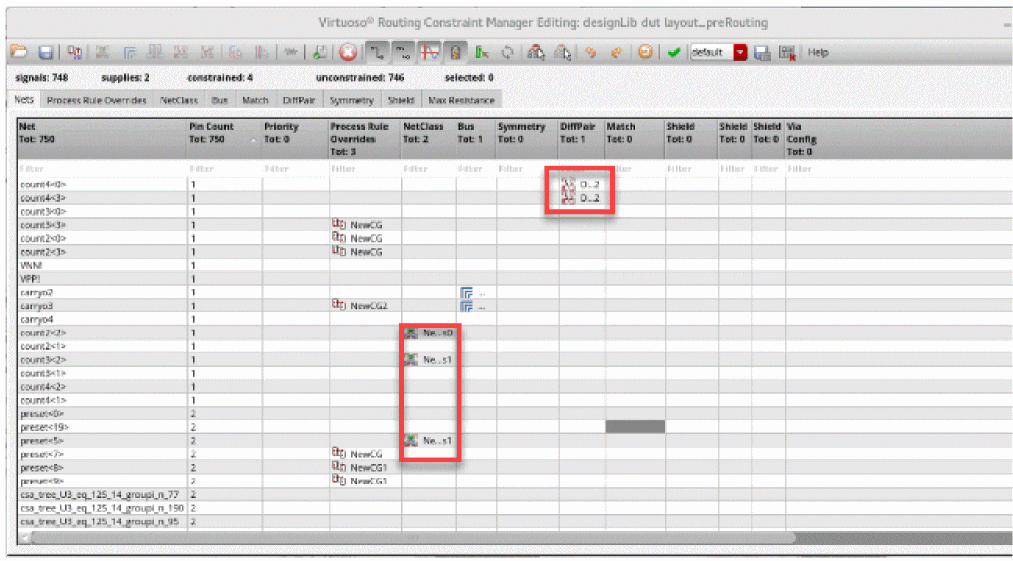
The Routing Constraint Manager displays. -
Select a net from the Net column on the Nets tab.
The constraints are activated depending on the number of nets selected. For example, you cannot add more than two nets to a DiffPair constraint group.
If you select a single net, all constraint icons are active except Bus, DiffPair and Match. The Bus, DiffPair, and Match constraints require at least two nets to be selected. - Click the button for the constraint that you want to create. For example:.
The created constraint appears in the specific constraint column of the constraints table.
An alternate method to set up a constraint is:
- Right-click the selected net. A menu is displayed.
-
Place the mouse cursor on the Create Constraint.
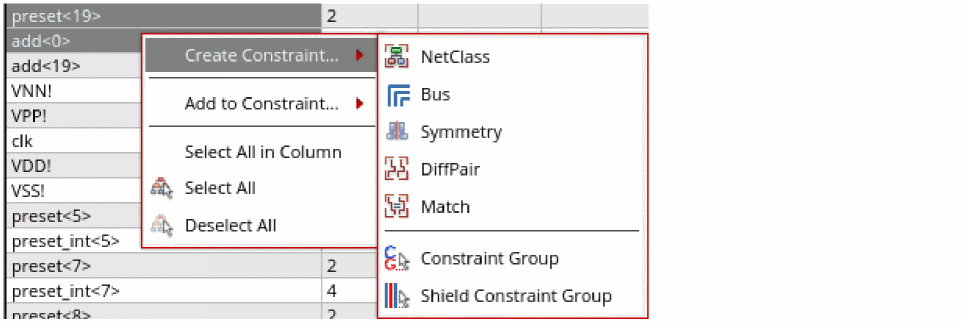
- Click the constraint name that you want to create. For example, to create the netclass constraint, click NetClass.
The created constraint appears in the specific constraint column of the constraints table.

Deleting a Constraint
- Right-click the constraint name that you want to delete.
-
Click Delete <constraint name>. For example, to delete a NetClass constraint, click Delete NetClass.
The constraint is deleted.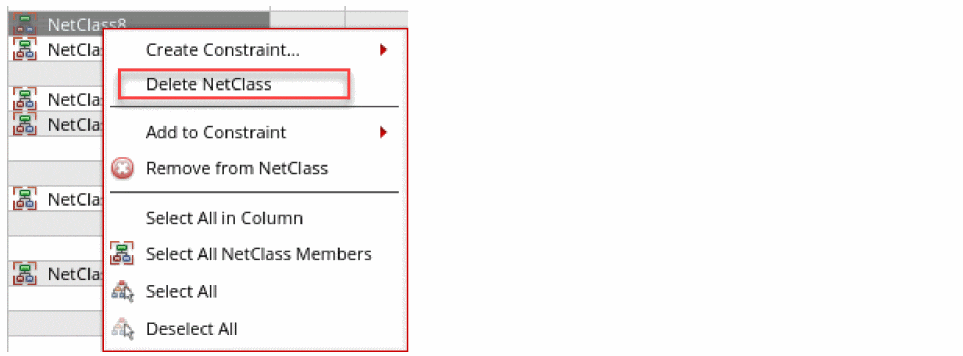
Removing a Net from a Constraint
To remove a net from a constraint:
- Right-click the constraint name next to the net name that you want to remove form the constraint.
-
Click Remove from <constraint name>. For example, to remove a net from the NetClass constraint, click Remove from NetClass.
The net is removed from the NetClass constraint.
Related Topics
Creating and Deleting a Constraint Group
Adding and Removing a Net from a Constraint Group
Return to top