Creating a Shield Constraint
To create a shield constraint and set the associated shielding net:
-
Choose Window – Assistants – Routing.
Alternatively, right-click anywhere on the layout window menu bar and choose Assistants – Routing.
The Routing assistant is displayed. -
Click Routing Constraint Manager
 on the Routing assistant toolbar.
 -
Select the net on which you want to add the shield constraint from the Net column in the Nets tab.
If you select multiple nets and apply a shielding constraint, a consistency check warning message is displayed in the CIW.

-
Click Apply Shield Constraint Group on the Routing Constraint Manager toolbar. Alternatively, right-click and choose Add to Constraint – Shield Constraint Group – <ShieldCGname>.
You can also right-click and choose Create Constraint…– Shield Constraint Group. This lets you to either use the existing shield constraint group or create a new one.
The shield constraint is added to the selected nets. You can now adjust the shield nets. -
To adjust shield nets, double-click the shield constraint group on a net.
The Edit Occurrence form appears. You can either edit the shield constraint group for all occurrences or for selected occurrence.

- Ensure that All Occurrences is selected. This is the default option. Selecting All Occurrences affects all constraints that are using this shield constraint.
-
Click OK.
The Shield Process Rule Override Editor form appears.
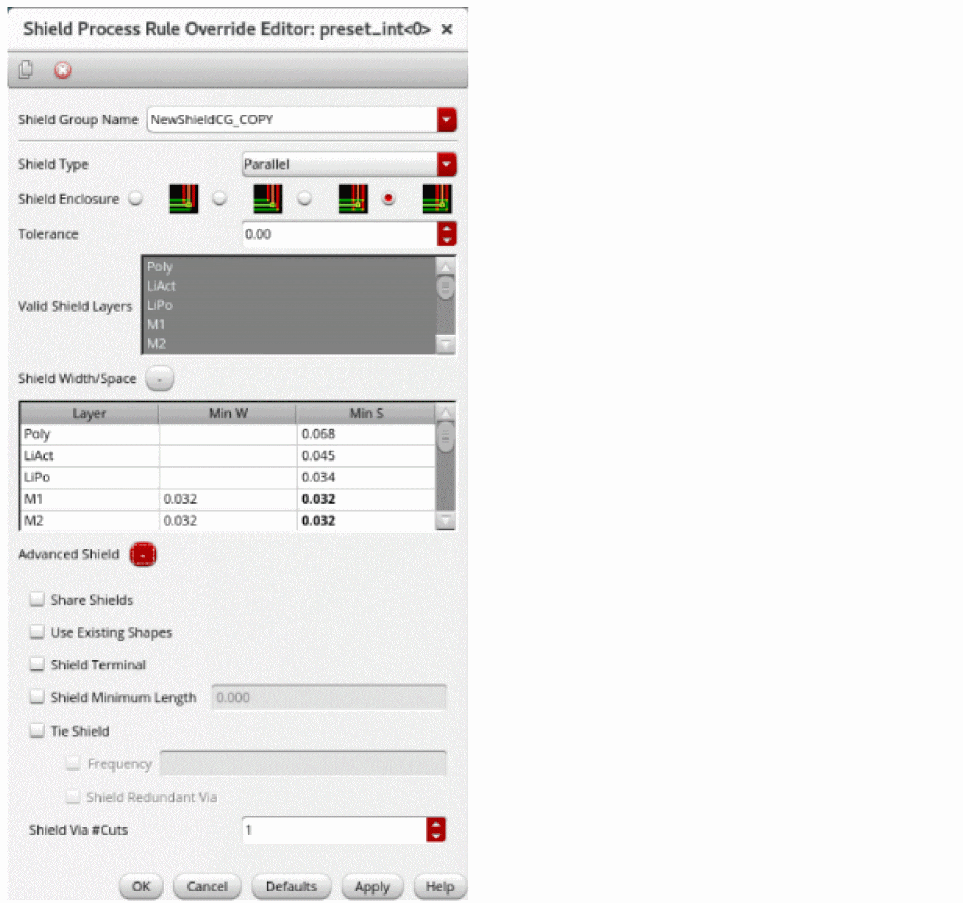
- Expand Shield Width/Space and the Advanced Shield sections to view the options.
-
Change the minimum width and minimum spacing to
0.1umfor the metal layers. -
Click OK.
You have defined the shield constraint on the selected nets and adjusted the shield nets.
Related Topics
Creating and Deleting a Constraint Group
Setting up a Constraint on a Net
Adding and Removing a Net from a Constraint Group
Shield Process Rule Override Editor Form
Return to top