Editing a Constraint
All constraints can be edited from their assigned tabs in the Routing Constraint Manager. You can double click and bring up the Process Rule Override Editor form for a constraint. In this topic, let us consider editing a NetClass constraint. To edit a NetClass constraint:
-
Double-click a NetClass constraint in the NetClass column.
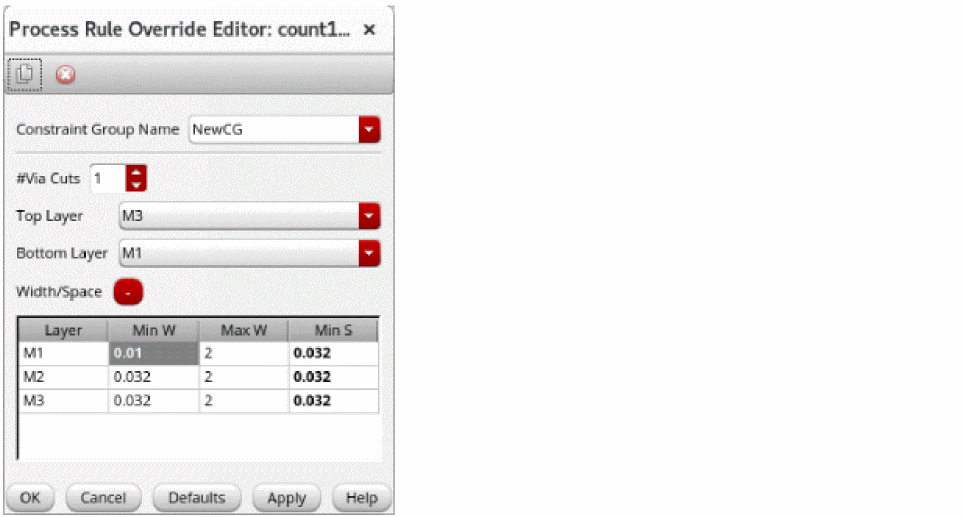
The Process Rule Override Editor:NetClass form appears without requiring a constraint group to be applied. Empty is displayed in the Constraint Group Name field in the form.
Alternatively, right-click the constraint and then select Edit Selected Value in Column NetClass.
The Process Rule Override Editor form appears. You can now create or edit the routing constraint.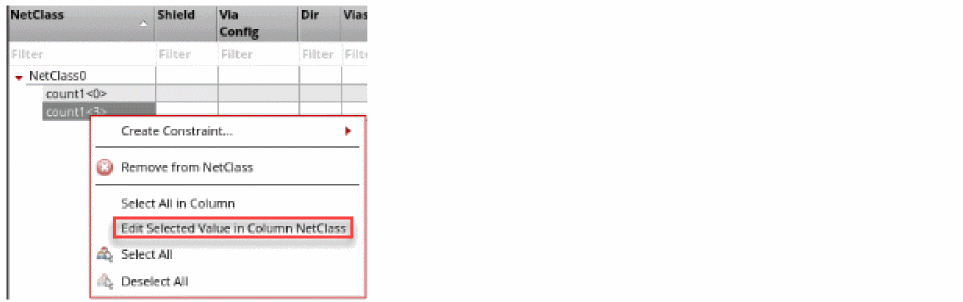
-
Change the group name without a constraint group. If you specify a group name that already exists elsewhere in the design or if the group name field is left blank, then the field with the group name or constraint group name is highlighted and all other fields are disabled until you have specified a unique name.

-
Select the constraint group name. If you override constraint values then the constraint group changes from Empty to the next unique constraint group name, such as
NetClass2. - Select a new value in the Via Cuts field.
- Double-click and change the width value of a metal layer. After changing the value, the color of the cell changes for the modified value. This color change reflects the change from the default value.
- Reset the width value to the default value. To do this:
-
Click OK.
The changes made to the constraint are visible in the respective columns next to the net name.
Related Topics
Creating and Deleting a Constraint Group
Setting up a Constraint on a Net
Adding and Removing a Net from a Constraint Group
Process Rule Override Editor Form
Return to top